How to Create a Gaming Tournament Site with WordPress
Creating a gaming tournament website for your esports team or league is a natural extension of the sport itself. You’re simply moving from one screen to another.
Using Sportspress Pro to compile and display your data allows you to control the look of your personalized website packed with data, brackets and players vying for the top.
In this post, I’ll share how to set up a gaming tournament website for your esports league as well as how to create and customize the site’s data to fit your specific game.
What is SportsPress Pro?
SportsPress Pro is a plugin for creating burly and professional WordPress sports sites. It’s designed specifically for sports teams with the custom design and functionality they need to make their online presence a breeze.
Some of the plugin’s best features are its automated standings, versatile event displays as well as player and staff profiles.
SportsPress Pro also has a fantastic tournament feature with brackets, automated score calculations and modules for a group stage portion of the tournament. The tournament feature also supports both single and double elimination.
Setting up the Scene
First things first: you’ll need your WordPress installation, your SportsPress Pro plugin, as well as a theme. The are several professional, robust and athletically-focused themes available that’ll do the job nicely.
If you haven’t set up a SportsPress website before, here are some resources to help guide you through: How to Create a Sports WordPress Website for Any Sport and Making a Slam-Dunk Tournament WordPress Site with SportsPress Pro.
Choosing a Preset Sport
The first page you should see after you have activated your SportsPress Pro plugin is the Setup Wizard.
Here, you can select a sports preset or make your own custom one.
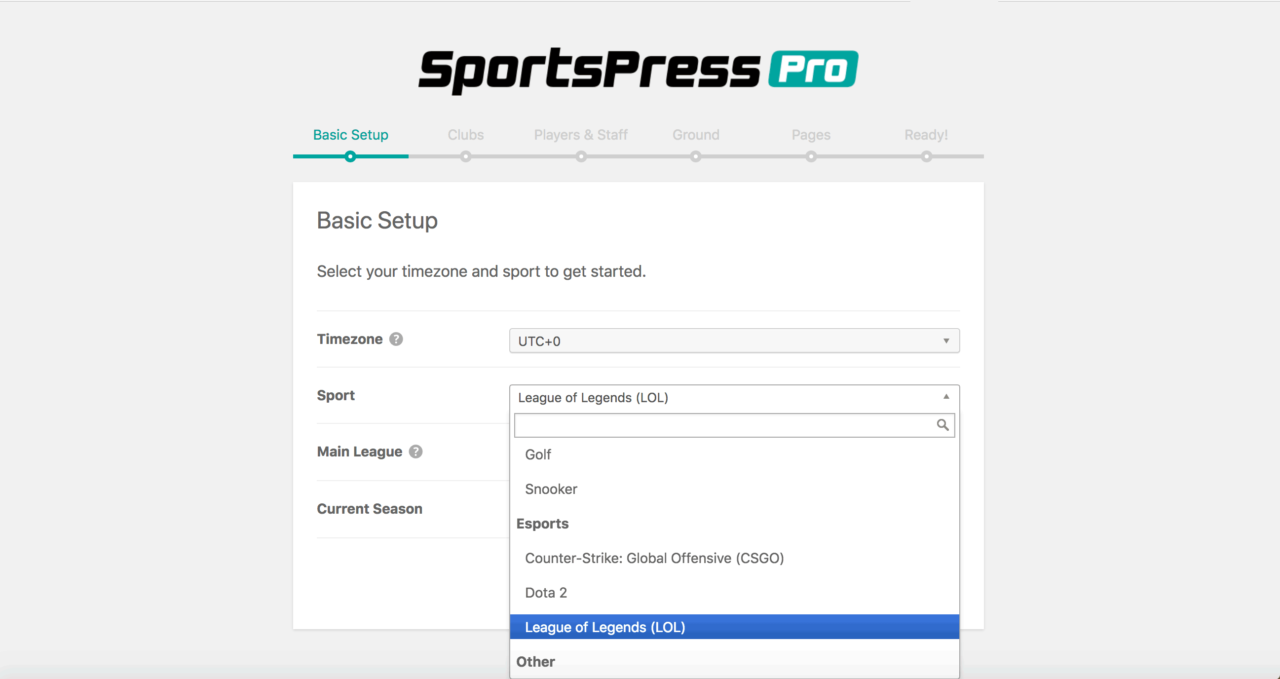
The esports available in the presets are:
- Dota 2 – You can display a rating adjustment per player, and generate leader boards with wins, losses and ratings. Also, calculate your win rates from match totals.
- League of Legends – With the LoL preset, you can keep track of kills, deaths, assists and gold collected per player. Also, display advanced statistics including KDA ratio and gold per minute.
- Counter-Strike: Global Offensive – The CS:GO stats including kills, deaths and assists for each player. KDA ratios are calculated automatically based on stats.
- Custom – You can choose this preset to create automated scoring systems, player stats, profiles and more for any esport you want.
If the esport you play isn’t available in a preset and you don’t want to start from scratch with the Custom preset, you can choose to alter an existing preset.
For details, check out Creating an Automatic and Custom Scoring System for Any Sport.
Demo Content
If you’re unsure how to start your gaming tournament website, try setting up some demo content first. SportsPress has three different demo presets that can give you a better idea of the plugin’s capabilities.
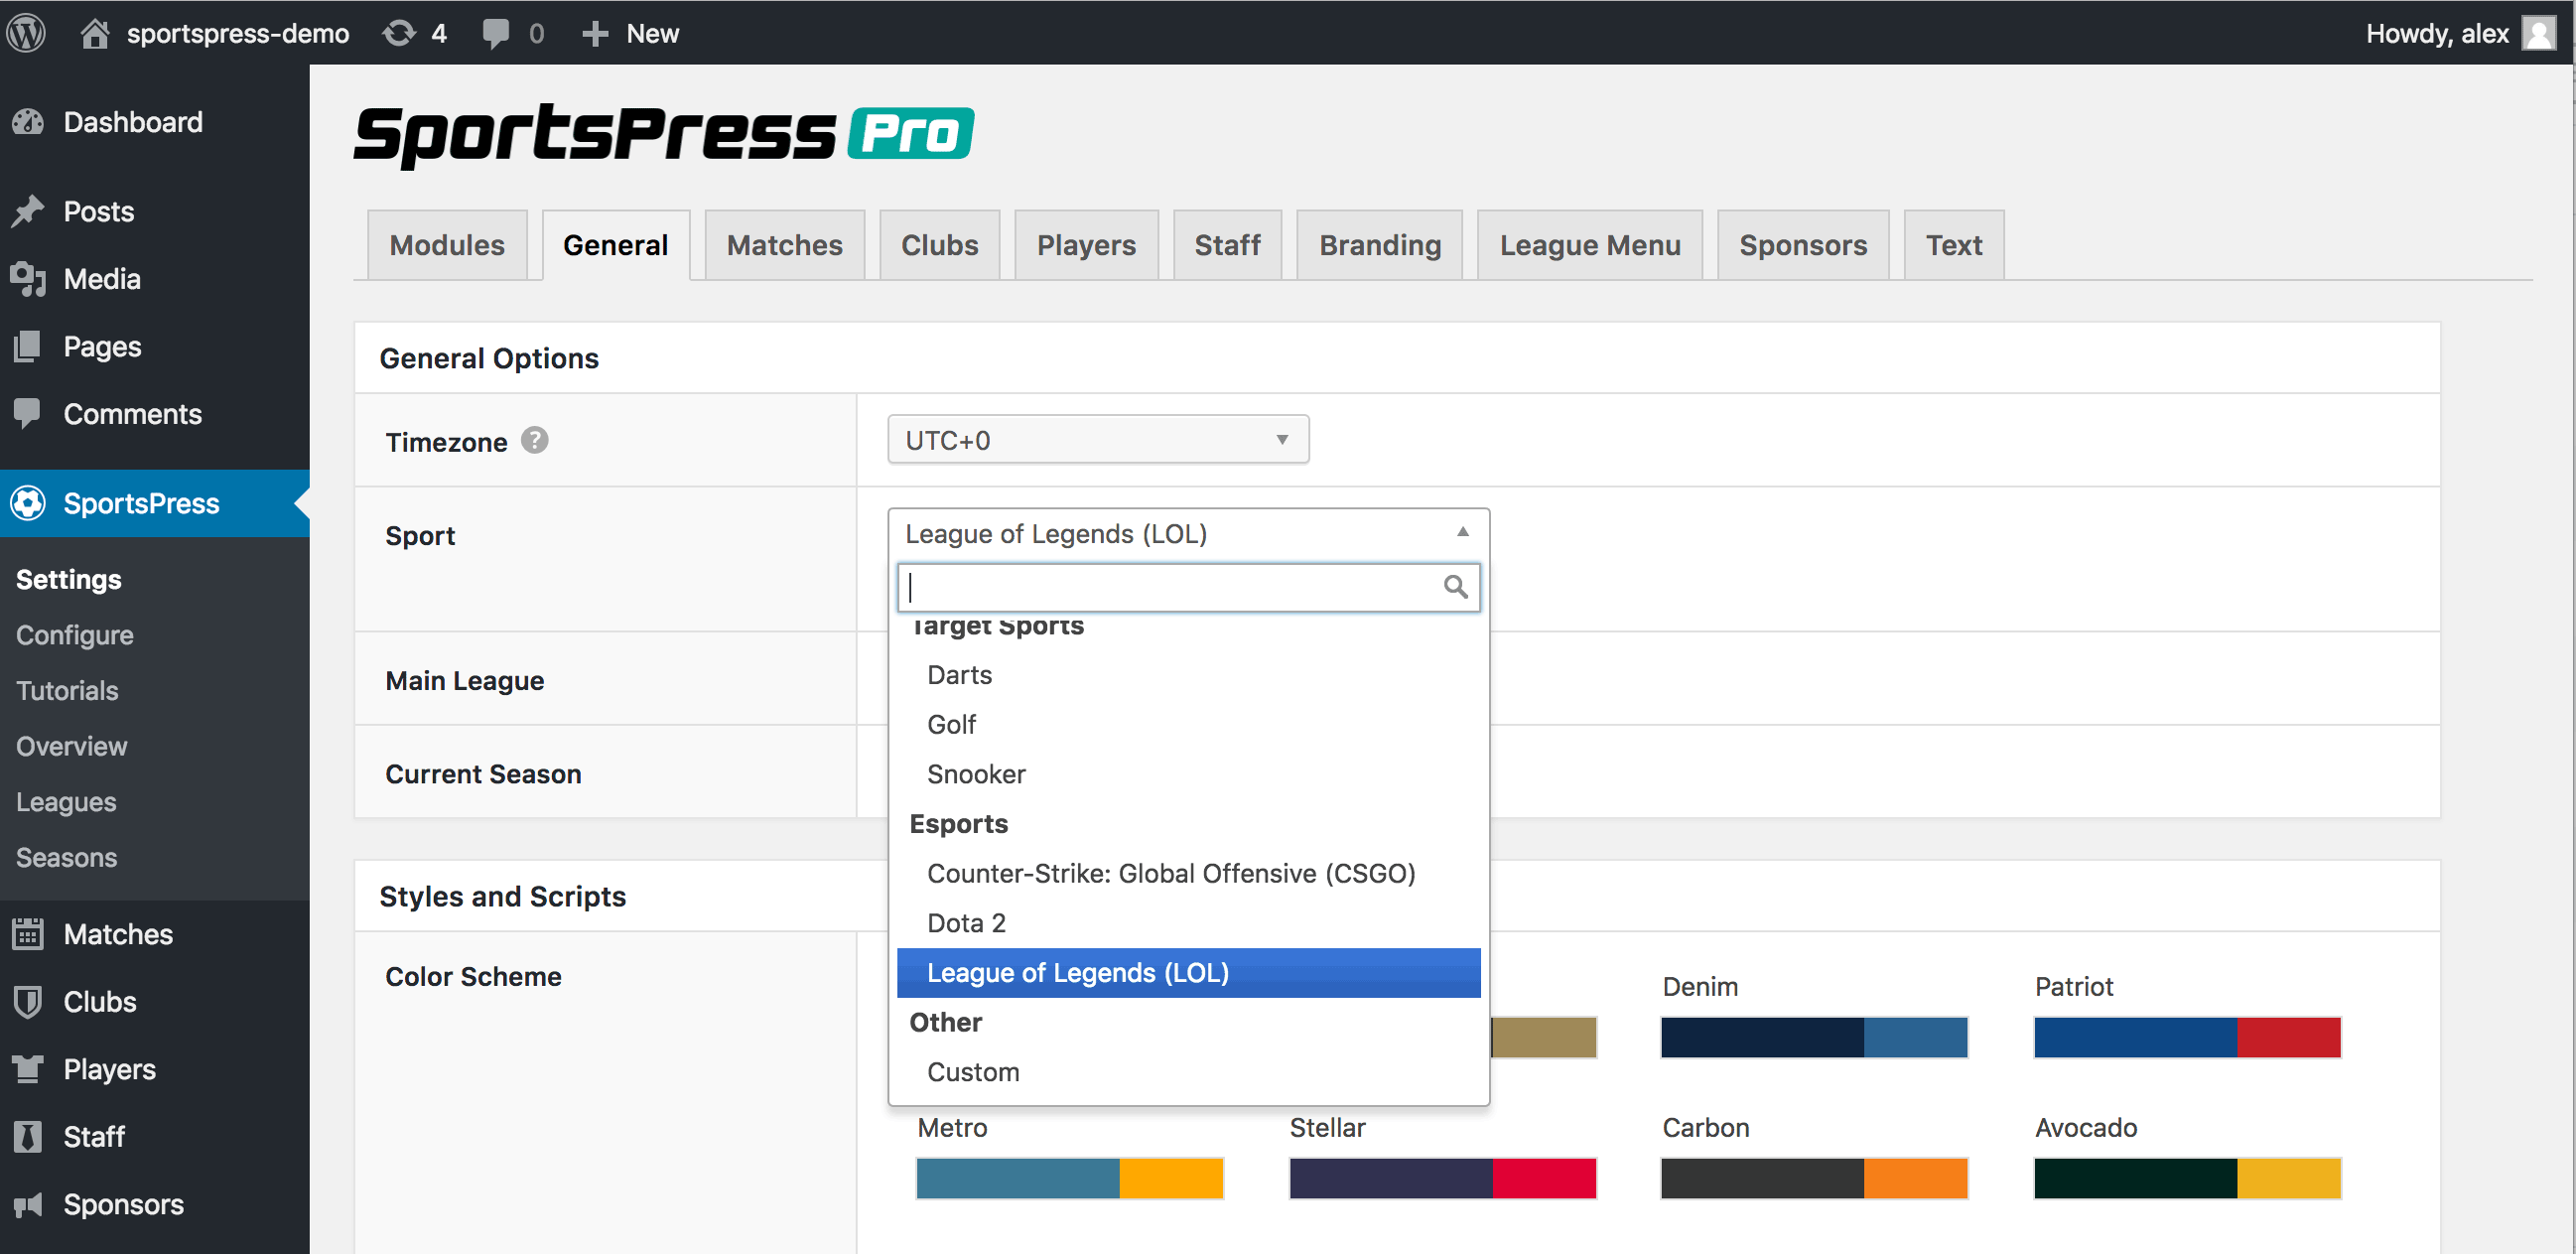
Go to SportsPress > Settings in your admin dashboard and select the General tab.
In the first General Settings section, you can select the demo content you want to load by checking the box Install Demo Content.
Make sure you click Save Changes at the bottom of the page.
The demo content will load and populate your site with a number of different elements. Then, you can test out the site’s features such as player and team stats and profiles as well as automated tournament score calculations.
You can check out How to Add Demo Content to a Fresh Installation of SportsPress for details.
Customizing Your Esports Site
If you have added the demo content, go to Matches > Tournaments in the admin dashboard.
Next, go to the Edit Tournament page by Selecting the name of the tournament from the list. Or, click Add New if there are none.
On the Edit Tournament page, you’ll be able to customize the way your tournament is displayed in a variety of different ways:
- Brackets – You can fill in the round, club or team names as well as the date, time and results of each match. When you set the dates and times for each match, the match page is created automatically.
- Layout – Decide whether you want the layout of your tournament bracket to appear one-sided or symmetrical with the winner in the center.
- Mode – Choose if your tournament Team vs. Team or Player vs. Player.
- Details – Select the league, season, single or double elimination and the number of teams competing. Input the winner of the tournament after it’s been decided in the designated spot.
- Featured Image – If you have a particular banner or image you have been promoting the tournament with, put it in the Feature Image box. It will appear on the Tournament page.
After inputting all the details, make sure you click Publish or Update.
Then, you can view the page for your gaming tournament website by clicking the View link at the top of the page.
Group Stages
The Edit Tournament page also has a Group Stages section that can be added.
Group Stages are the early Round Robin trials in a tournament and are a common occurrence in the esports world. They’re a great way to show results before progressing to the main tournament.
To create a Group Stage, scroll down to the bottom of the Edit Tournament page to the module marked Group. Click Add New.
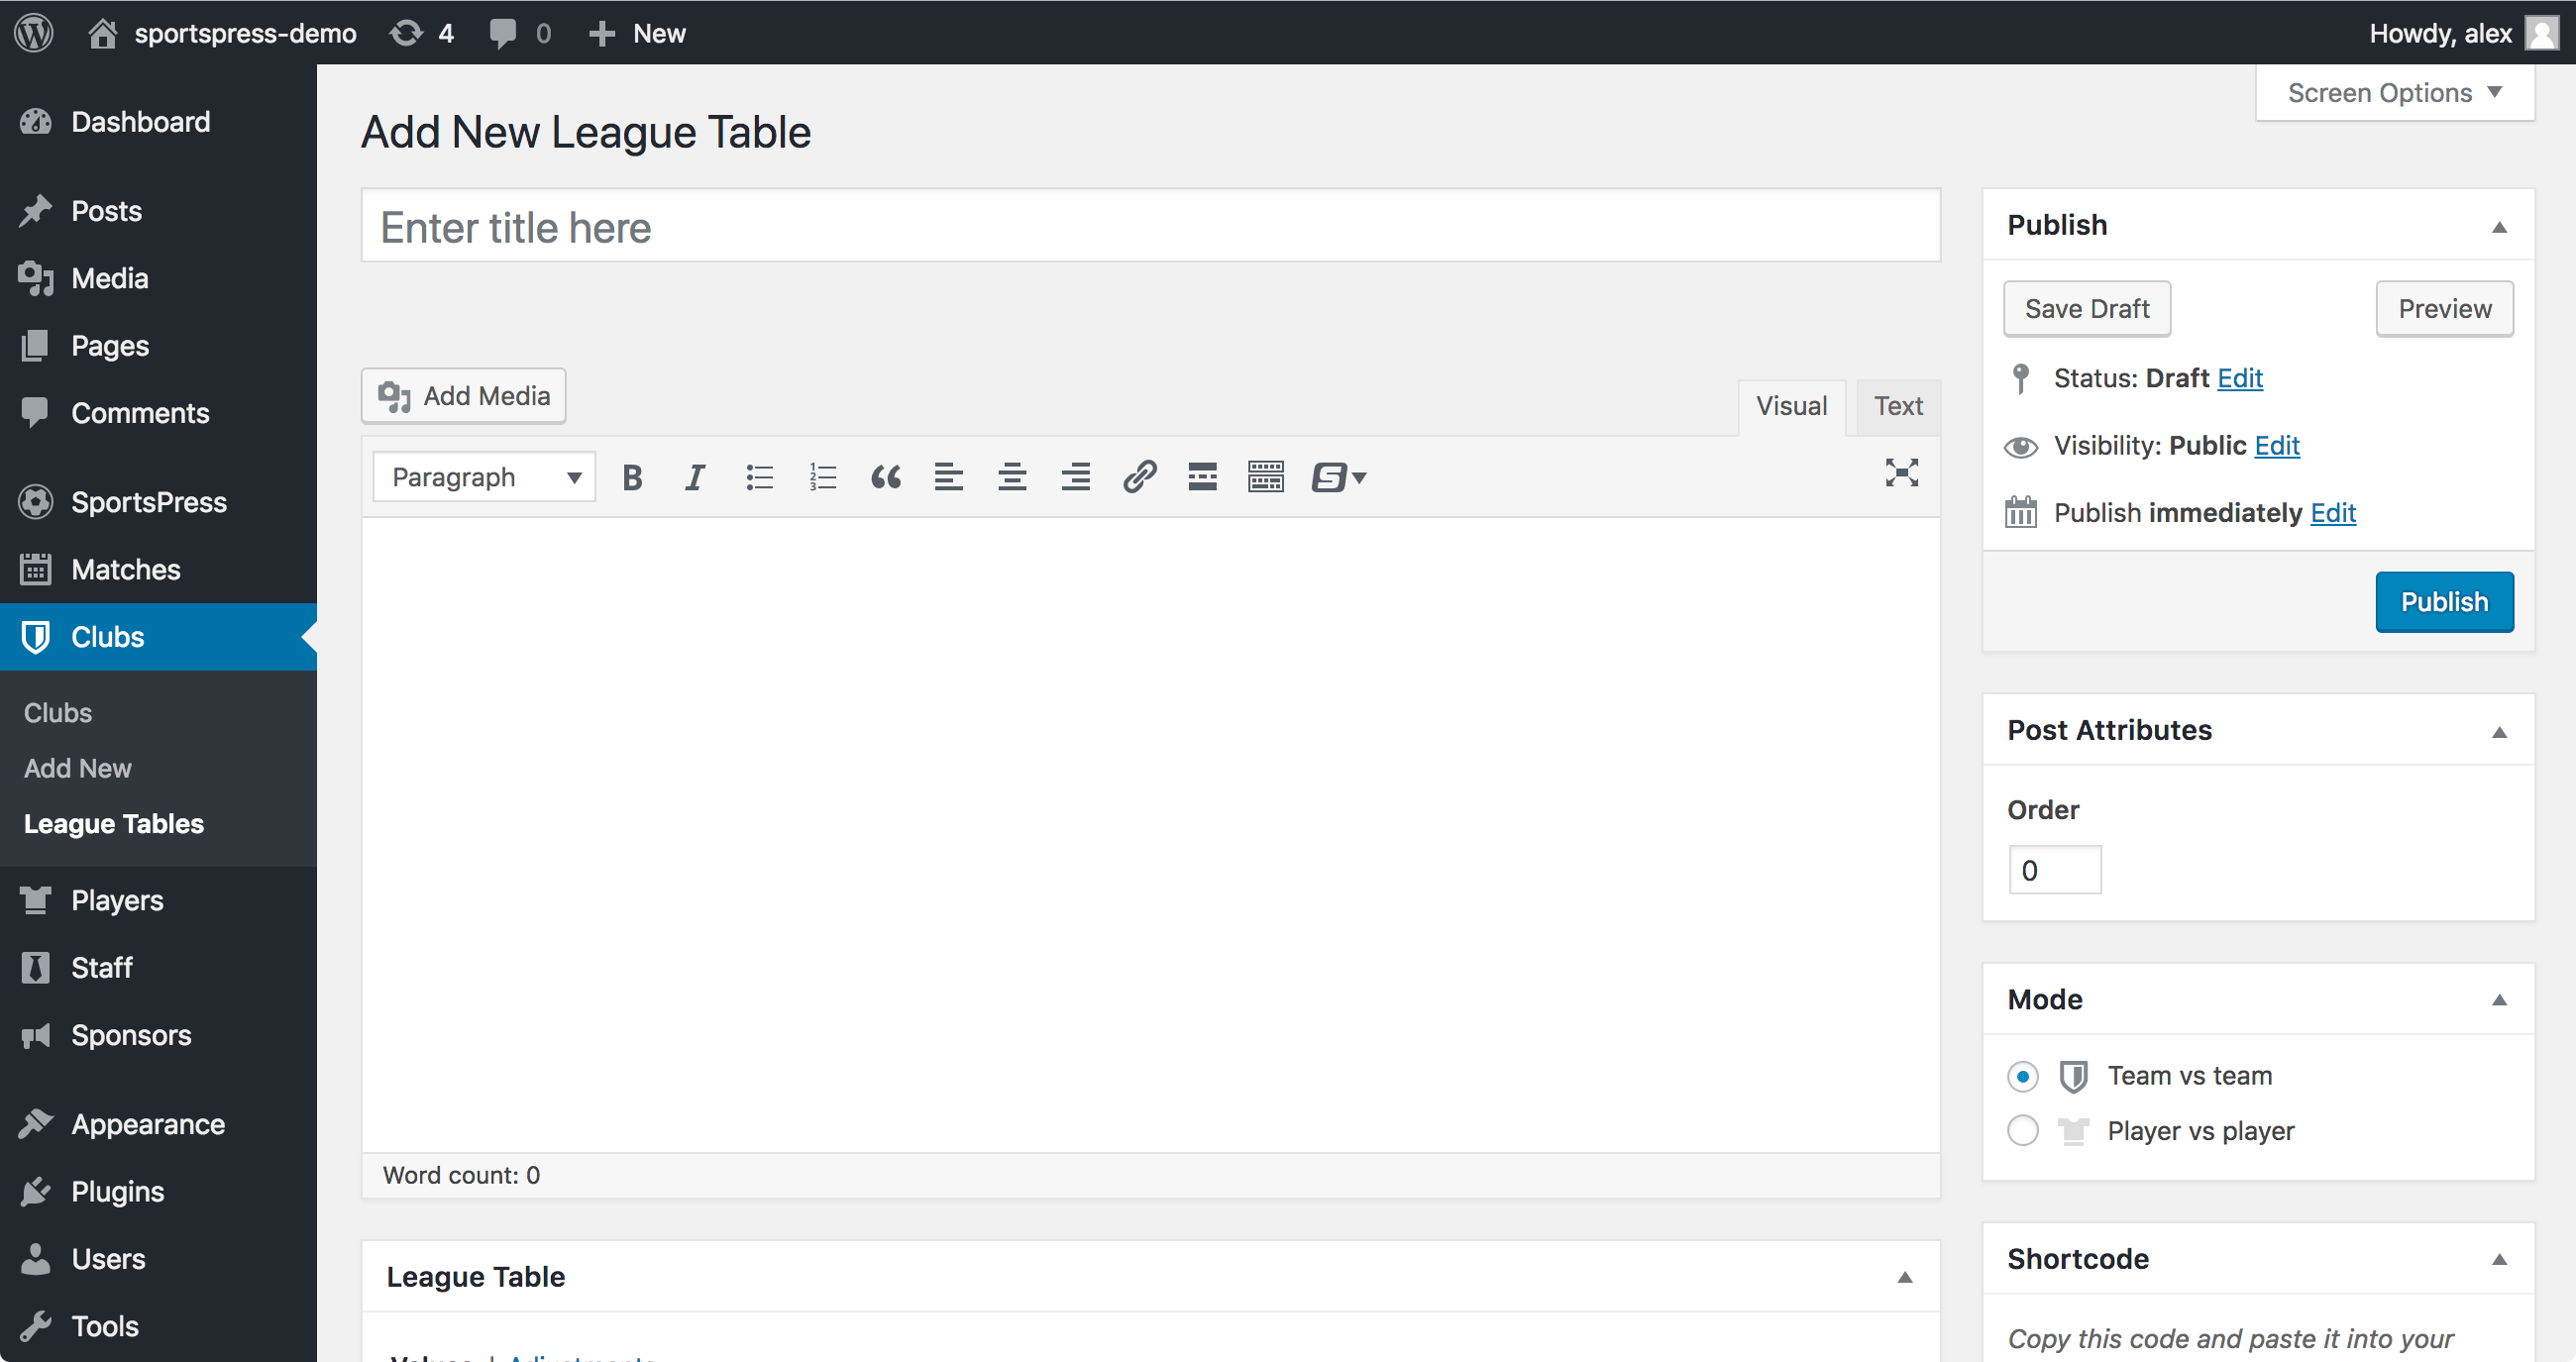
On the Add New League Table page, you can input information about the Group. Select what individual teams belong by going to the sidebar and clicking the drop down under Clubs.
Click Manual, then the Update button.
You’ll be able to select what statistics you want displayed. You can add more on the Configure page.
Create as many Group Stages as you need for the tournament and it’ll all be displayed on one page.
For details, check out How to Create League Tables.
Work the Configuration
One of the main ways to fully customize your website for a gaming tournament site is through the Configure page. It houses all the team and player statistical equations. It also contains Event Specs, which appear on an Event page.
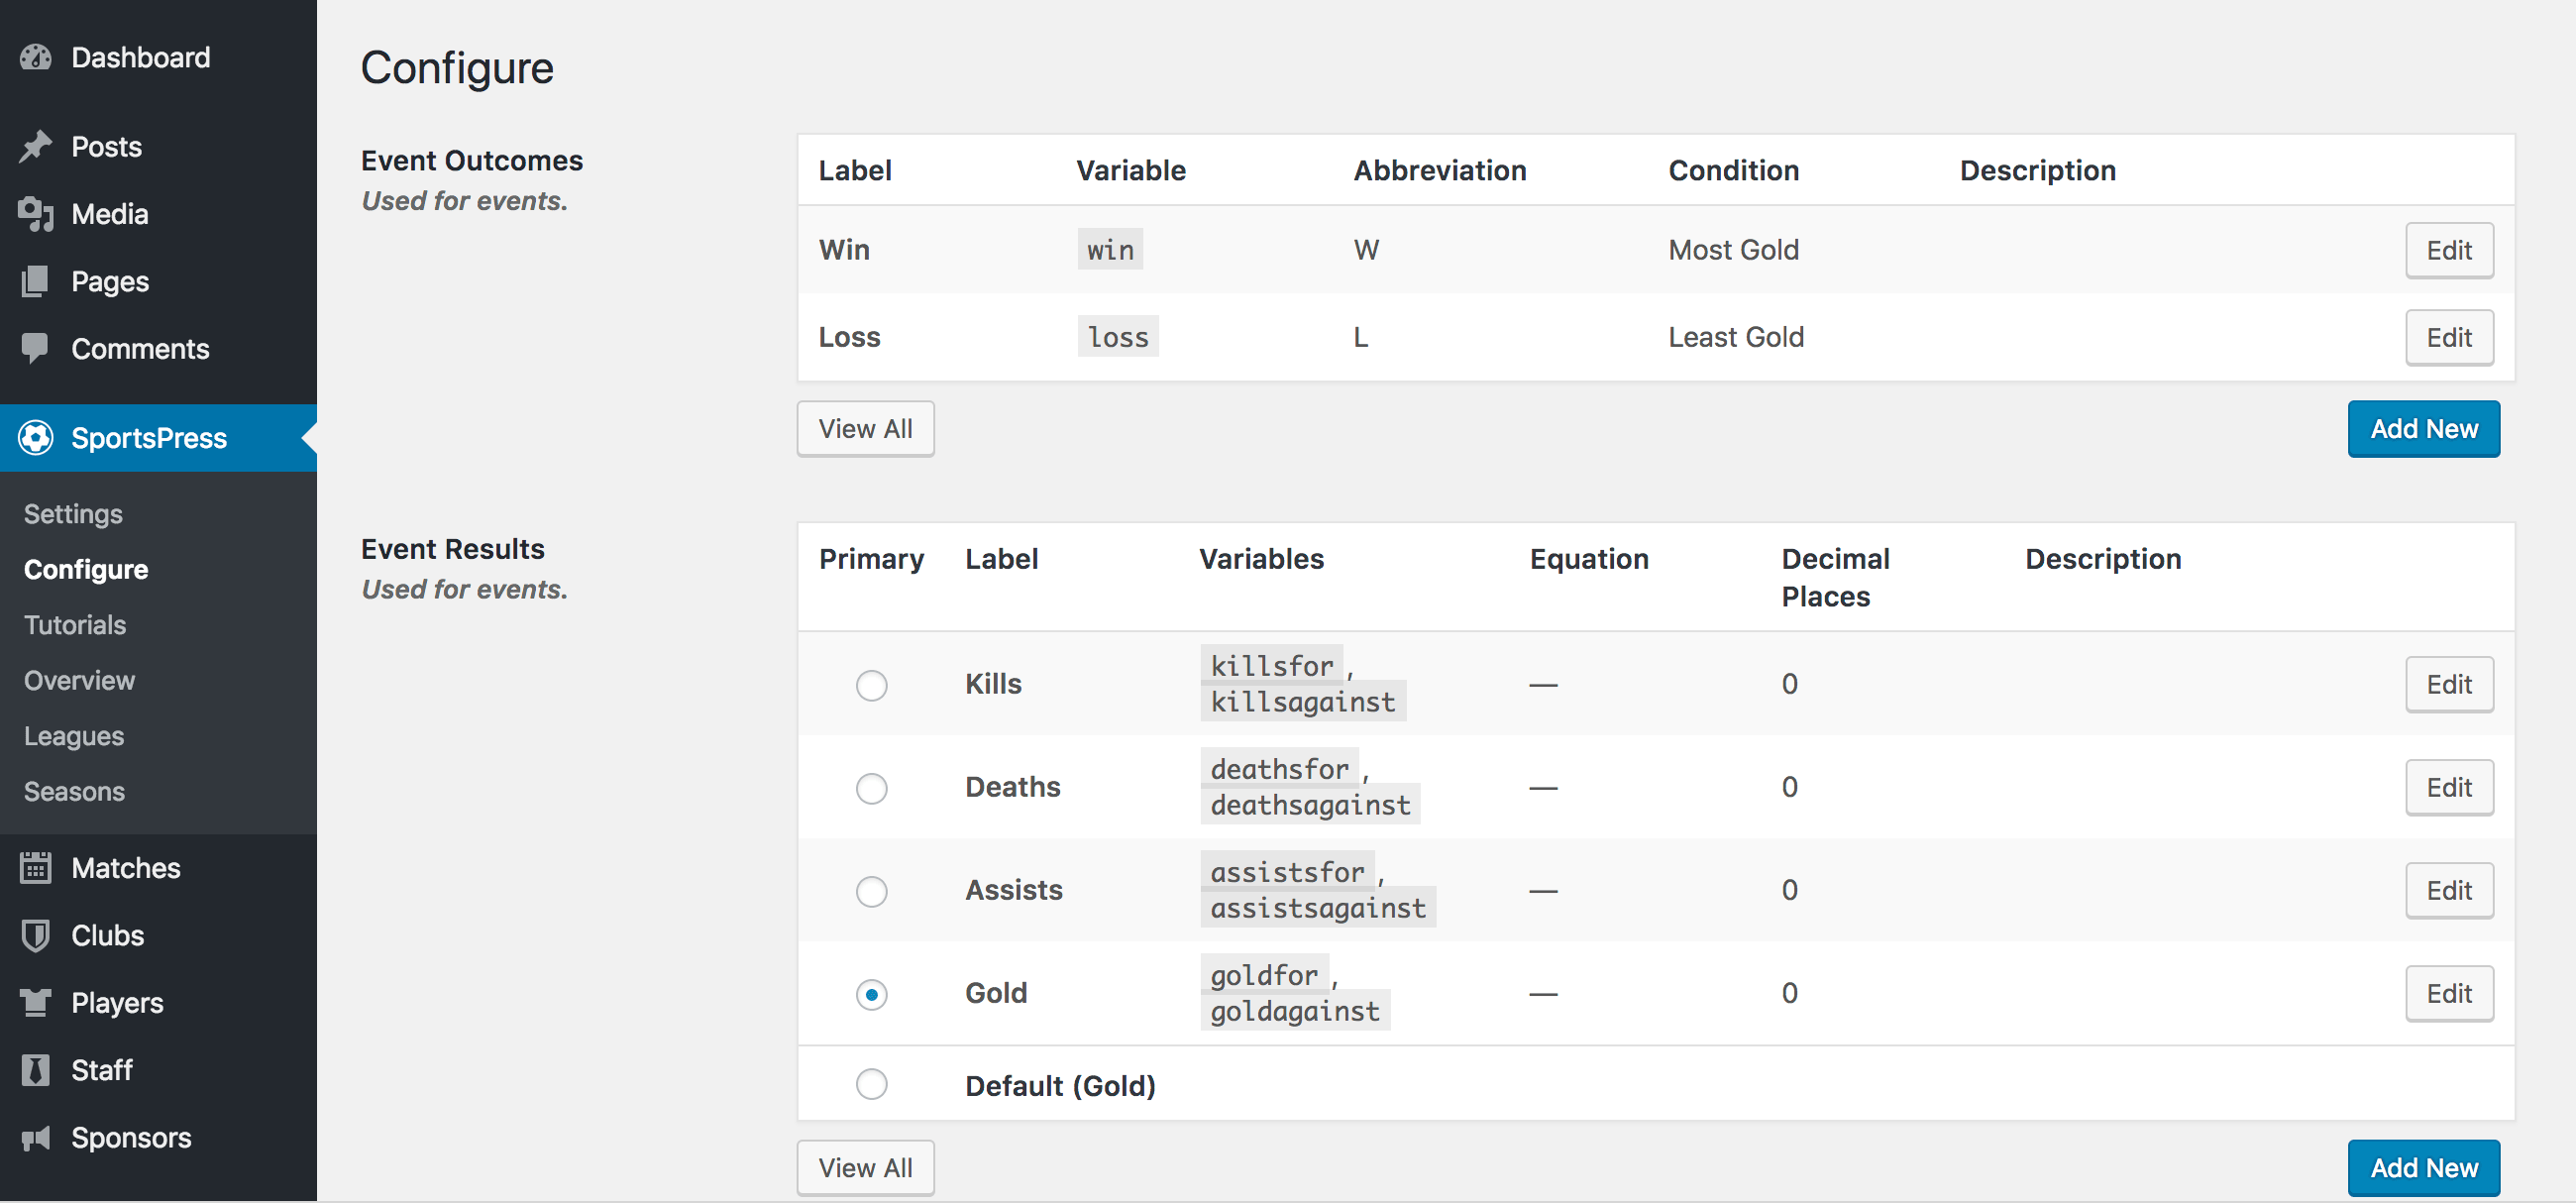
Here are the various categories your statistics can fall into:
- Event Outcomes – They’re used for the final determination of a match. Typically, they’re Win, Lose and sometimes Draw or Tie.
- Event Results – These are elements of the final outcome at the team level such as the number of Kills, Assists or Gold.
- Player Performance – You can measure the individual contributions to a game with individual Kills, Assists, Gold and other factors.
- Table Columns – This is used for the League Tables on the match page or elsewhere on the site. League Tables are customizable tables that can display whatever information you want for team comparison.
- Player Metrics – These are the standard bits of information used to describe your player such as hometown, age, years played and anything else you want to include. You can create your own and customize them here.
- Player Statistics – Player Statistics are used for Player Lists, which is a version of a League Table, but for individuals. Players and their statistics can be compared by whatever metrics you want to put in the table.
- Event Specs – You can include details about an event that can be input on the Event page such as location, weather, attendance and anything else you want.
You can create your own configurations on top of these, alter the existing ones or erase it all and start fresh. With the Configuration page, total customization is at your fingertips.
Sponsors
Sponsors are a large part of an esports tournament so they should be on a gaming tournament website. SportsPress Pro has a number of features to help you display your sponsor logos with pride.
Display sponsors in the header, footer or widget areas of your site. Sponsors get an individual profile that helps track the number of impressions and clicks a logo or page receives.
SportsPress Pro also has a Sponsor Levels feature. Levels help you distinguish and recognize those sponsors who have gone above and beyond. Then, you can arrange and display them in any order you want.
For example, you can prominently showcase sponsors who contributed the most before all the others.
For details, check out Displaying Sponsors and How to Add and Attract New Sponsors to Your Sports WordPress Site.
Ready Set Go
Whether you’re on a field or a computer screen, getting your head in the game is much easier when you don’t have to worry about your online presence.
SportsPress Pro has a ton of tools to help you build your gaming tournament website so you can get back to practising.
When tournament time comes around the hard part is done and you can let the best player win.
Did SportsPress’ esports functionality surprise you? What elements excite you? Are there any more esports features you want for your esports tournament website? Let us know over on Twitter or Facebook.
