Making a Slam-Dunk Tournament WordPress Site with SportsPress Pro
Building a robust sports tournament WordPress website can seem like an overwhelming and complex task. What with all the teams and logistics that go along with it. That is unless you use SportsPress Pro.
With the SportsPress Pro plugin, you can turn WordPress into a home run of a tournament website. You can build one complete with unlimited teams, players, matches, staff and sponsors. It also includes built-in calculations for scoring in over 20 different sports and team games.
Plus, with the flexibility of WordPress, designing and styling your website any way you want is straightforward, especially if you use a sports theme.
Today, I’ll show you how to build a tournament WordPress website from start to finish using the SportsPress Pro plugin.
The Initial Setup
To begin, install and activate SportsPress Pro on your WordPress website. It’s compatible with both single and Multisite installations of WordPress.
It installs and activates like most other plugins. Download SportsPress Pro, then go to Plugins > Add New in your admin dashboard. Then, click on the Upload Plugin button toward the top of the page.
Click Choose File and open the plugin file on your computer, then on Install Now. When the plugin is installed, click on Activate or Network Activate for Multisite networks.
For details check out Managing Plugins.
Basic Configuration with the Installation Wizard
Once SportsPress Pro is installed and activated, the setup wizard appears. It helps you quickly configure the basics of your tournament WordPress website.
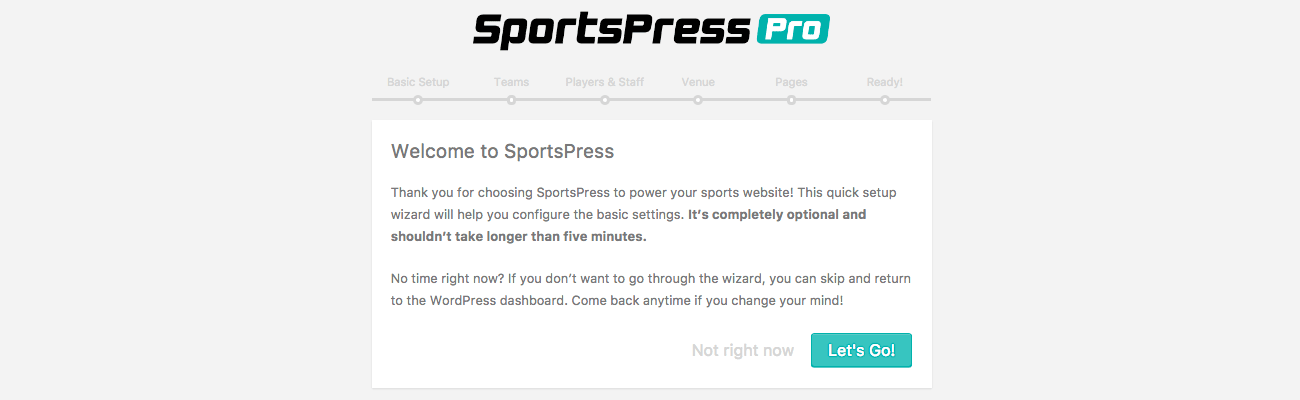
It’s optional, but it makes the process a lot smoother and faster since it only takes about five minutes. To get started, click Let’s Go or you can skip it by clicking Not right now instead.
Basic Details
When you continue with the setup wizard, you’re asked to enter some basic details including your time zone, the sport you want to set up, the name of a league or division and the year of the current season.

When you’re ready, click Continue. On the next page, enter the name of a home team and their rival team. While you’re only adding two teams right now, you can add as many as you want later on.
Once you have entered the team names, click Continue again.
Next, add the names and positions of the first few players and the name of one staff member for the team. You can certainly add all the players and staff you need to configure once the setup wizard has finished.

When that’s done, click Continue once again.
Choosing a Venue and Adding Pages
On the following page, you’re able to choose a venue by naming it, including and an address. There’s also see a map of your selection to be sure what you entered is correct.
You can add more venues later, but for now, start with one in the setup wizard.
If you don’t know the exact address of the venue, that’s not a problem at all. Click, hold, and drag the marker on the map and drop it in the correct location. An address automatically populates in the corresponding field.

Now that this is taken care of, you can click – yes, you’ve guessed it – the Continue button. There’s only one page left in the setup wizard.
The next step shows you details on the pages that are automatically generated for you if you continue. They help keep your tournament WordPress website running well and helps keep it organized.
The pages that are automagically created are:
- Calendar – Organize and publish calendars using different layouts.
- Leaugue Table – Create automated league tables to keep track of team standings.
- Player List – Create team rosters, player galleries, and ranking charts.
- Sponsor – Attract sponsors by offering them advertising space on your website.
- Staff Directory – Organize and display staff in list and gallery layouts.
- Tournament – Schedule tournaments and create interactive playoff brackets.
When they’re added, edit them as needed in the admin dashboard like you would any other page in WordPress.
Finishing Up with the Setup Wizard
Click Continue one more time to get to the final page of the setup wizard. You can also opt out of creating these pages by clicking on Skip this step instead.
The last page lets you know the setup has been successfully completed. Click the Schedule Your First Event button to do exactly what it says and return back to the back end of your website.

When you click the button to create an event, you may see an admin notice at the top of the page if the sport you chose requires an additional plugin. If this is the case, you can install it straight away by clicking the Begin installing plugin link displayed in the message.
Adding Additional Details
Now that the basic setup is complete, you can add all the events, teams, players, staff and sponsors that you want.
I’ll go through adding each in detail. Since you’re already on the Events page after the setup wizard has finished, I’ll start there.
Scheduling an Event
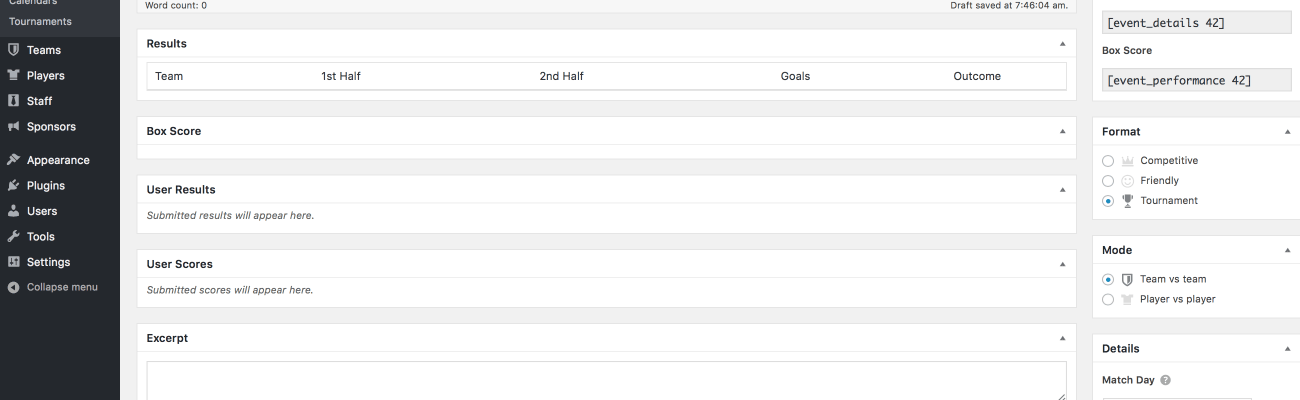
You may notice that the interface looks similar to the back-end of a regular page. Add a title at the top to replace Event that’s already displayed. In the main text area, you can add a description as you see fit.
It may be important to note that the title can be automatically generated for you. The names of the two teams going head-to-head in the match can be displayed if you leave this field blank.
On the right, you can click Edit next to Date/Time to schedule the match. It works the same way as scheduling a post for the blog.
Similarly, edit the Time to signify whether the game is on time, TBD, postponed or canceled.

Under that section, you can find shortcodes you can use on any page to display game details including the results.
In the Format section, select Tournament and keep the default team vs team setting the same in the section directly below.
Once results of the game are entered later after it has been played out, they automatically appear on the event page. You definitely aren’t going to need to enter in scores multiple times.
Also, enter the event’s details further down the page including the duration, competition name, season and venue.
Below that section, you can add teams, players and staff members. It’s possible to start with the two teams you created during the setup wizard or you can come back to this section later once you have added more teams.
When you’re done, you can click the Publish or Schedule button toward the top of the page.
Creating and Editing Teams
To view and manage your current teams as well as add others, go to Teams > Teams in your admin dashboard.
Hover over the teams on the list to view options including Edit, Quick Edit, Duplicate, Trash and View.

If you want to add a new team, you can do that by going to Teams > Add New.
Either way, similar to adding an event, enter the team’s name in the title field along with a description, their website’s link, Twitter username and other details.
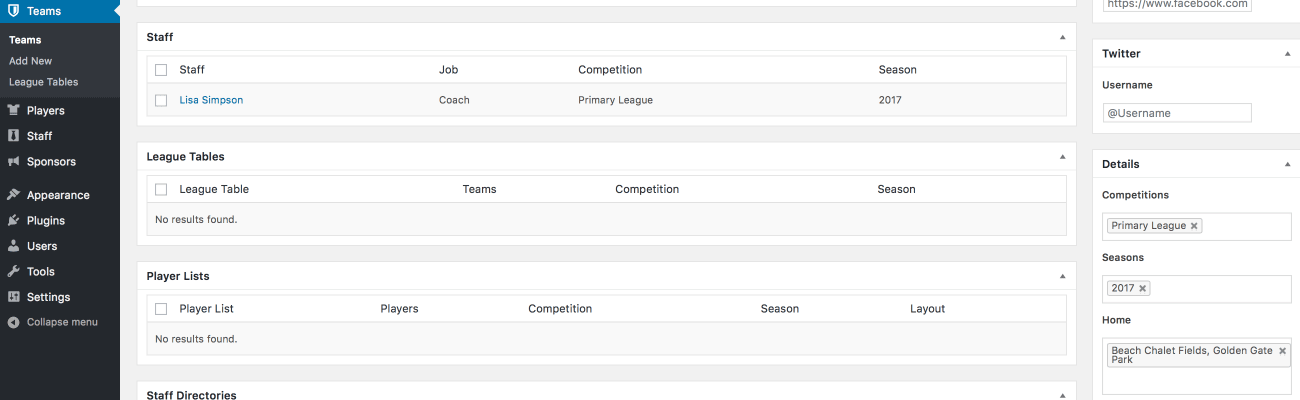
In the main area of the page, select the check boxes of the staff, players and league tables that are on the team. You can add players and leagues later if you don’t have any yet.
On the right, select the league, season and home field or arena. Also, upload a team logo directly beneath these settings.
When you’re happy with the changes you have made, click Update or Publish toward the top of the page.
Adding and Editing Players
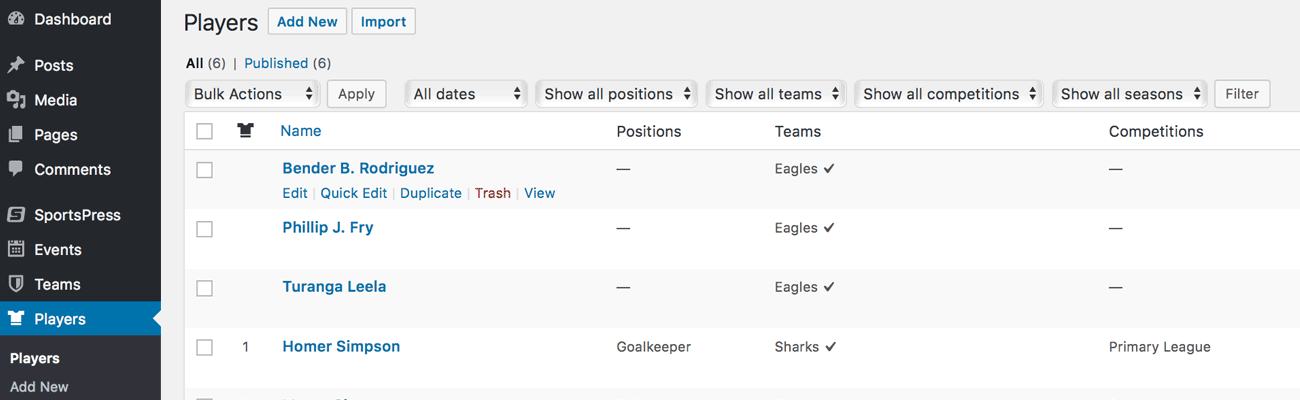
Creating and editing players is done in much the same way. Go to Players > Players to manage current players or Players > Add New in your admin dashboard to create a new player profile.
If you view a list of the current players, you can hover over a name to display options. They’re the same ones as mentioned earlier for the Teams page.
Click Edit on that page to manage the details of the player you selected.
Whether you’re adding or editing a player’s profile, the page you see to manage them should be the same, minus any previously added details.
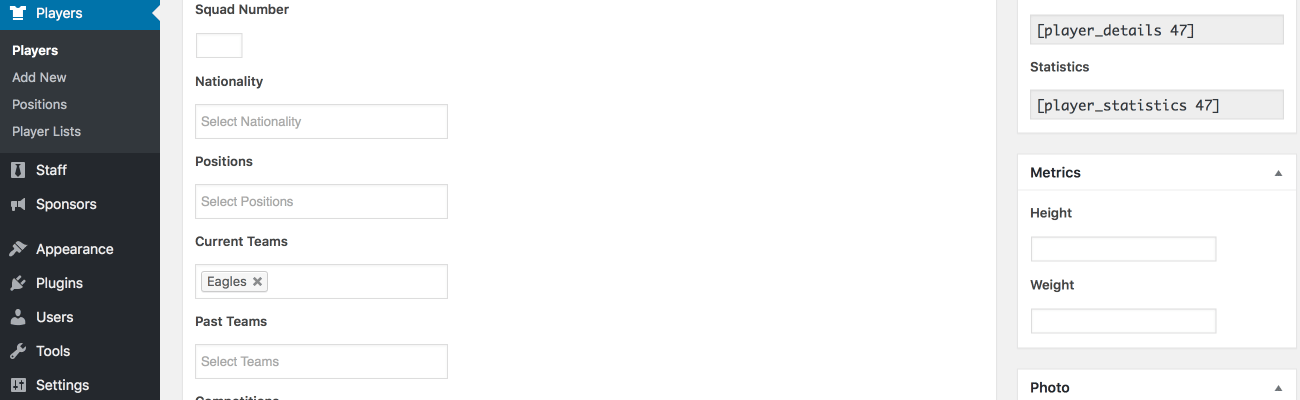
Like adding events and teams, you can enter a player’s name in the title box and include a description, their Twitter username and other details such as their team, league, season, height and weight.
You can also upload a photo of them directly on this page. It adds the image into your Media Library and you can select the photo for the profile you’re working on while on the editing page.
There are also shortcodes listed for you to use on any page you want on your website.
By now, you know the drill. When you’re finished, click the Update or Publish buttons to save your changes.
Adding Staff Members
At this point, you’re probably sensing a pattern and you would be right. Adding and editing staff members and sponsors is similar to adding events, teams and players.
You can view and manage a list of staff members across all teams by going to Staff > Staff. Hover over a name and click Edit to adjust any details you want as needed.
Creating a new staff member is as simple as going to Staff > Add New.
There, you can add similar details as previously mentioned such as their job title, current and past teams, leagues, seasons, a photo of them as well as their contact details. Shortcodes are also listed so you can display the staff member’s profile anywhere on your website.
Creating Sponsors
If you want to view a list of the current sponsors and edit them, go to Sponsors > Sponsors in your admin dashboard. Hover over a name on the list and click the relevant link for the action you want such as Edit.
When you view the list of sponsors, there’s a column called Impressions. This is the total number of times the sponsor’s page has been viewed when a visitor was browsing your website. There’s also a Clicks column that tracks the number of times a user has directly clicked to view a sponsor’s profile.
Impressions are different from clicks because a sponsor’s details can be displayed anywhere on your website and that’s what’s being tracked. Clicks, on the other hand, means the number of times the specific sponsor’s profile was visited because a user decided to click on their page to view it.
These are particularly handy for helping recruit sponsors. If you’re able to tell a potential backer that these analytics can be tracked, they may be more willing to support your tournament or teams since they can actively see how much advertising they’re getting in return for their investment.
When adding or editing a sponsor, you can include their name, a description, their website’s URL and their logo.
Additional Settings and Configuration
There are also a lot more advanced settings and configuration options you can adjust under the SportsPress menu item such as display options, color schemes, branding, custom labels and more.
The Configure page with further customization options directly related to the game such as adding your own event outcomes and results, player performance types, metrics and statistics as well as team options.
Additionally, adding and managing an unlimited number of competitions and seasons is also an option.
Customization with Widgets
Displaying widgets with all the details and player statistics covered above in your theme’s sidebars is also possible. Go to Appearance > Widgets.
They work like most other widgets so they’re easy to use and configure. You can activate one of your choosing by dragging and dropping them in the sidebar section where you want the widget to be displayed.
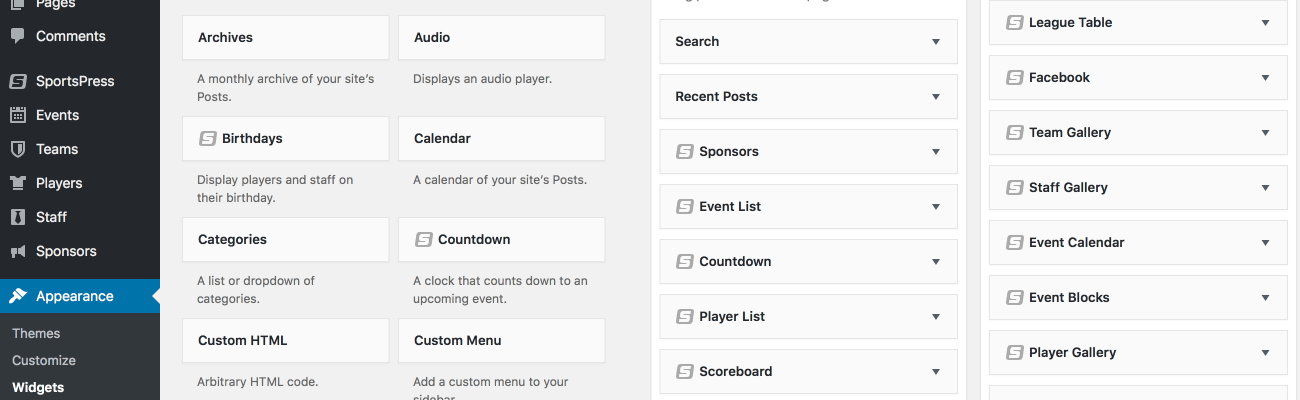
There are a ton of widgets to choose from:
- Birthdays
- Event Calendar
- Countdown
- Event Blocks
- Staff Gallery
- Player Gallery
- Event List
- League Table
- Staff
- Player List
- Scoreboard
- Sponsors
- Staff List
- Team Gallery
Click the Manage with Live Preview button toward the top of the page to open the WordPress customizer and see how your widgets are actually going to be displayed on any page of your website.
Wrapping Up
That’s it! You’re all set to push it over the goal line and create a tournament WordPress website that’s as robust as it is stunning and functional. All that’s left is styling and designing your website the way you want it.
What kind of tournament WordPress website do you want to create? What features are you looking for in a plugin to create a tournament website? Have you made a website with SportsPress Pro that you want to share? Feel free to add your voice of experience on Twitter and Facebook.
