How to Add an Event Calendar & Upcoming Games to a Sports Team Site
Pop quiz time: what’s the thing that fans of sports teams care most about? Is it a great website? Awesome content on social media channels like Twitter, Facebook or Pinterest? Or is it excellent content marketing?
While these things are important for the success of sports team online, in the end the thing that fans most care about are the events. Whatever sport you are into, what matters most is what happens in the games and competitions.
As a consequence, besides the information about players (for example, in the form of player profiles), schedules of upcoming events are one of the main reasons to swing by your site.
To give the people what they want, this is exactly what we will talk about in this blog post. You will learn how to add an event calendar to your sports team website and other ways to display upcoming games.
Are you ready to roll? Then let’s get right to it.
Here’s How to Add an Event Calendar to Your Sports Team Website in WordPress
What follows is an easy way to add an event calendar to your team website in order to keep your fans up to date.
Install the SportsPress Plugin
The SportsPress plugin is the perfect solution to easily add the features we are looking for. It is chock full of everything you need to build a professional sports team website and an event calendar is just one of them.
So, the first thing we will do is install it on our website. To do so, you can either find it in the WordPress directory or go to Plugins > Add New on your site. Once there, simply look for the name, it should be the first search result.
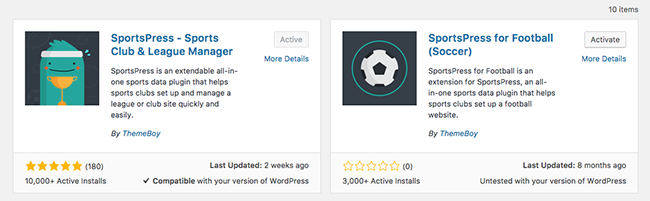
Hit Install Now and wait until it is downloaded, then don’t forget to activate. Once you do, you will meet the onboarding client that lets you set up the basics of the plugin like teams, players, venues and pages.
Everything is pretty self-explanatory. If you are having troubles, we explain every step in our article on how to create a baseball site with SportsPress that you can use as a reference.
Create Your First Event(s)
Once you are through with the installation wizard, we can go right ahead and create our first event. This is so we have something to fill the event calendar with when we set it up in a bit.
So, our first stop is Events > Add New.
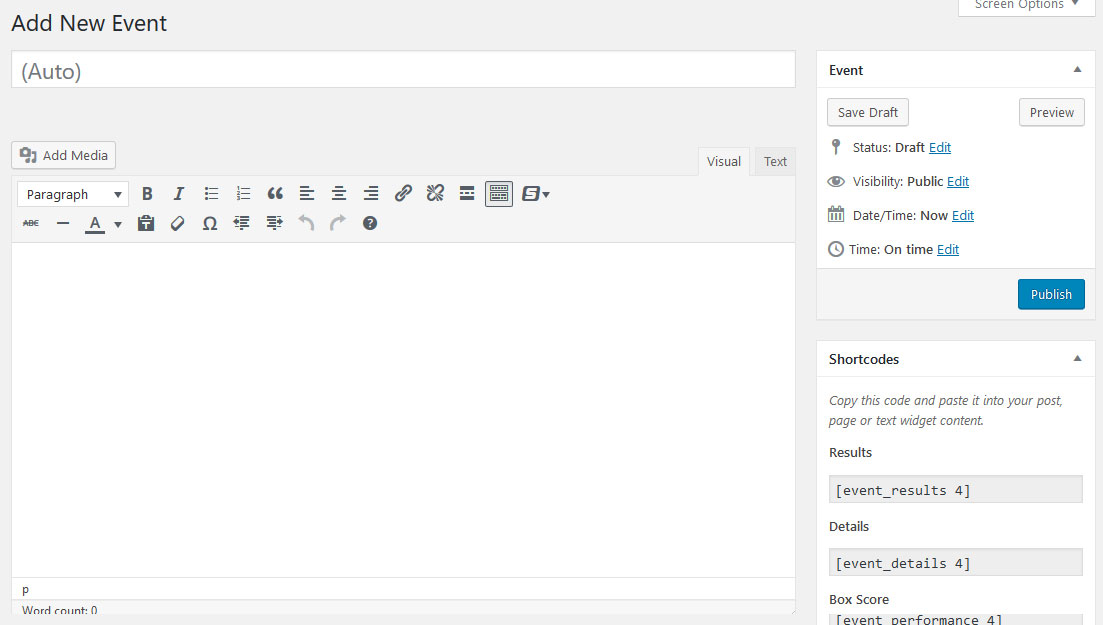
The screen should look quite familiar to anyone who has ever worked with WordPress. In SportsPress you can pretty much create anything in the tried-and-true environment.
One of the main differences for events: there’s no need to enter a title. Instead, SportsPress will generate one automatically from the competing teams. However, you may enter a description in the editor field that will show up on the event’s page.
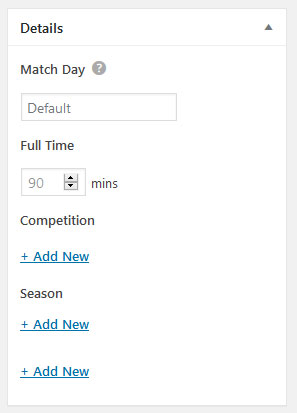
Next, under Format, pick whether it’s a competitive or friendly event. Then move on to Details to pick the competition, season and optionally the venue of the event. You can also leave the latter to auto, that way SportsPress will automatically pick the home team’s venue.
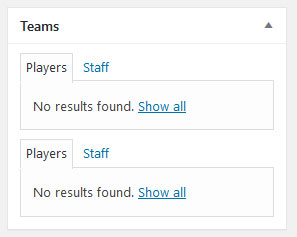
Further down you can choose the teams that will compete against each other and optionally players and staff that will be involved.
Finally, you may add a featured image or video if desired. That’s it for the basic options. However, before publishing, don’t forget to pick the right date and time from the Event box.
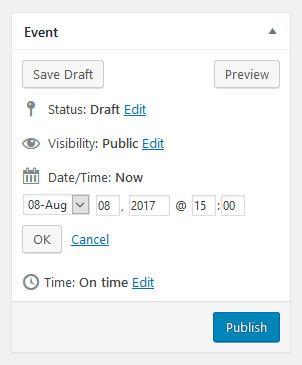
While this usually schedules the publishing date of a blog post, in this case it determines exactly when the event takes place. Once you are done, hit Publish to finish creating your event. If you want, you can set up a few more to fill the calendar with more options or just move on to the next step.
Set Up a Calendar
After that, it’s time to to get started with the event calendar. For that, our next destination is Events > Calendars. Here you will find a list of all calendars already on your site. To add a new one, find the respective button at the top and click it. This will take you to the editor screen once more.
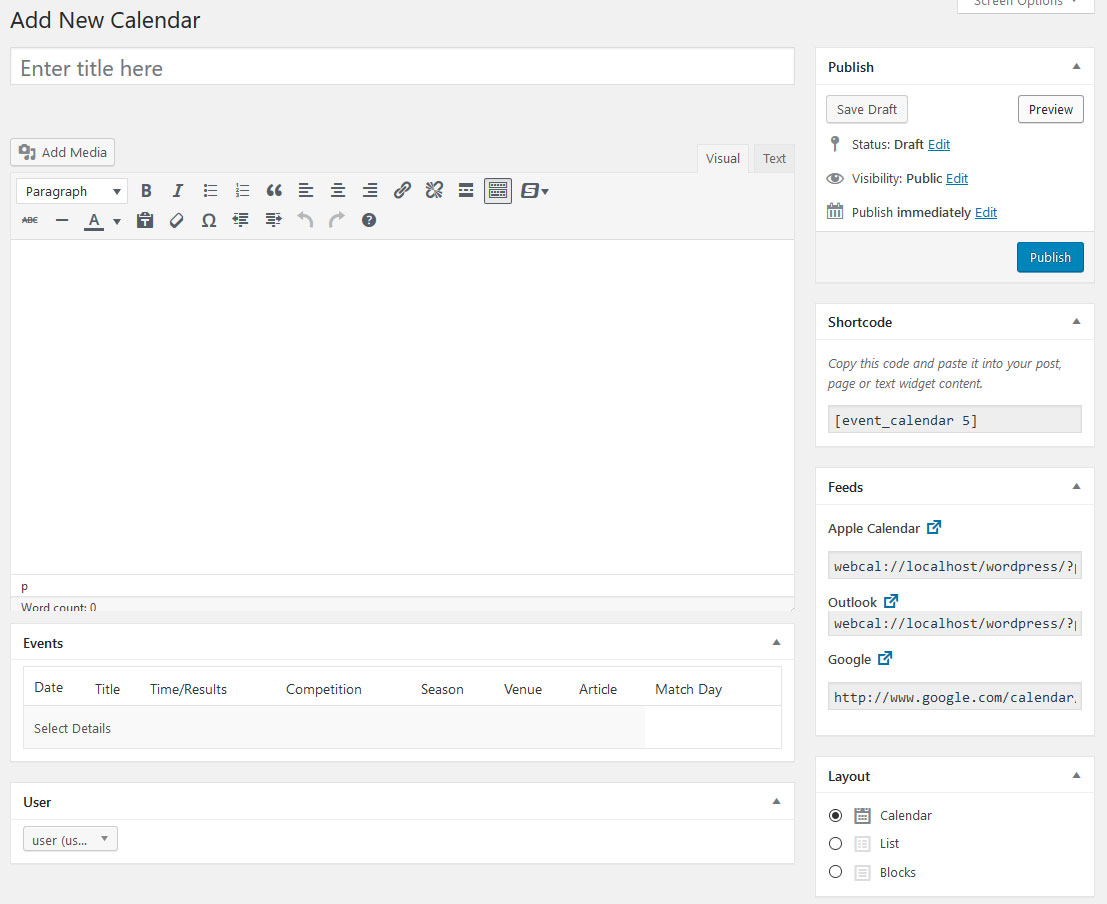
Here, the first thing to do is add a name for the calendar. This can be something like Upcoming Games or any other title of your choosing. After that, turn to the Details column.
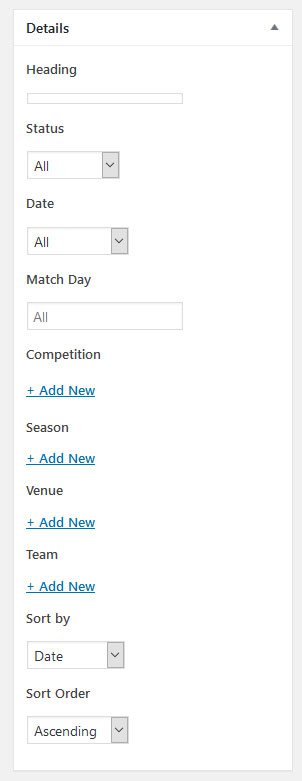
Here, you can determine what type of events will show up in your calendar. Options are:
- Type of events — Determine whether past events, future events or all events show up in the calendar
- Date — Limit events to a certain time span like today, this week or a date range
- Match Day — Set a custom match day for the event (more details in this blog post)
- Competition — Limit events in the calendar to a certain competition
- Season — Determine what season to display events from
- Venue — Show only events from a particular venue
- Teams — Limit events to just one team
- Sort by — Determine how to sort the events, by date or match day
- Sort order — Choose between ascending or descending order (the first is best for upcoming events, second better to display results of events that already happened in the past)
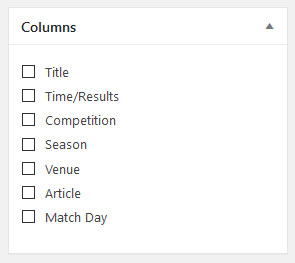
Under Columns, you can also decide what information to display to users. This part will get more important further below.
Add an optional featured image if you want. After that, it’s time to publish. Well done! You just created your first event calendar!
Check the Event Calendar on the Frontend
After patting yourself on the back, it’s time to see the calendar in action. For that, change to the frontend of your site by clicking View Calendar.
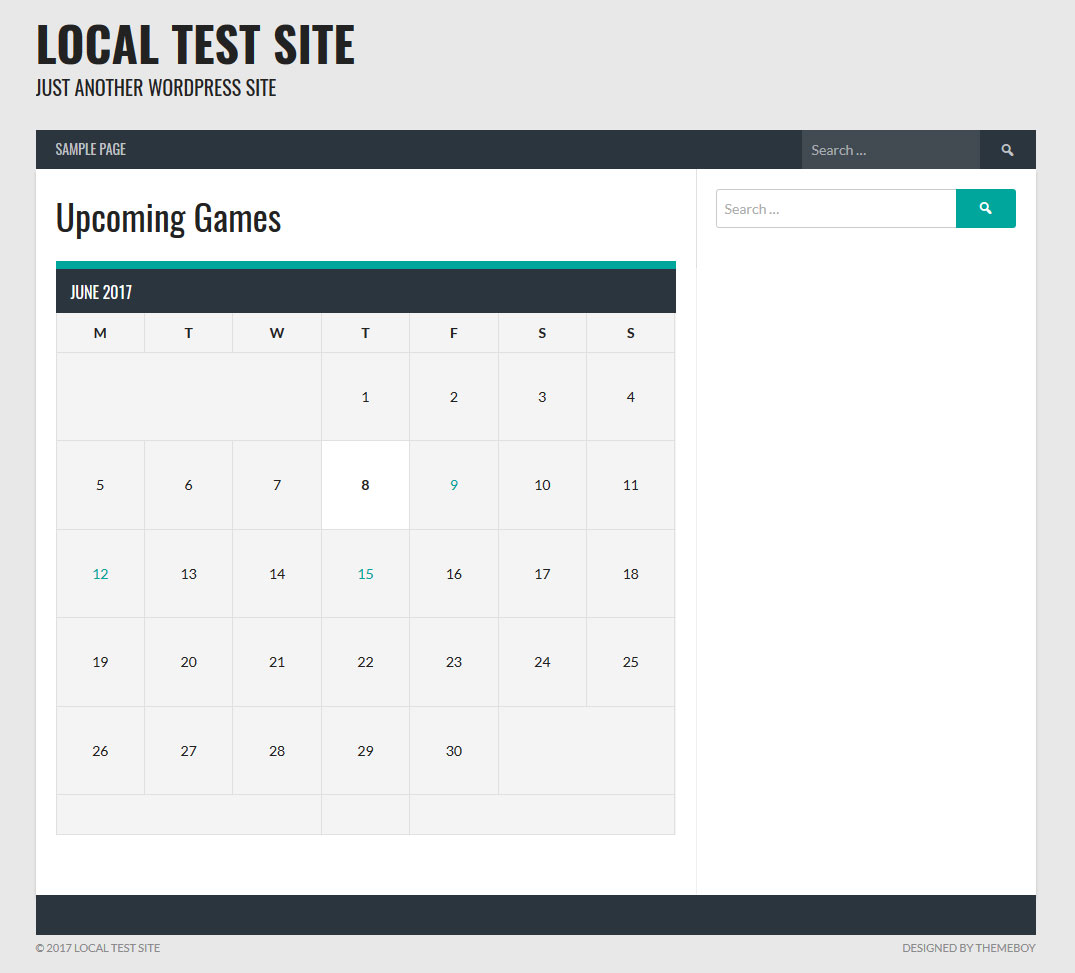
Once you do, you should be able to see all the games included in the event calendar. If you have seen an event calendar before, it will be very familiar. Dates that include events are highlighted. When you hover over them, you can see the details for upcoming events. Finally, a click on a highlighted event will take you to that event’s page.
Change the Layout
However, the classic calendar view is not the only option to display upcoming events. You might have already noticed the Layout box in the calendar creation page.
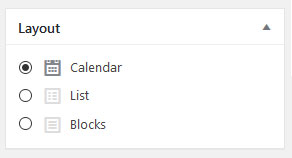
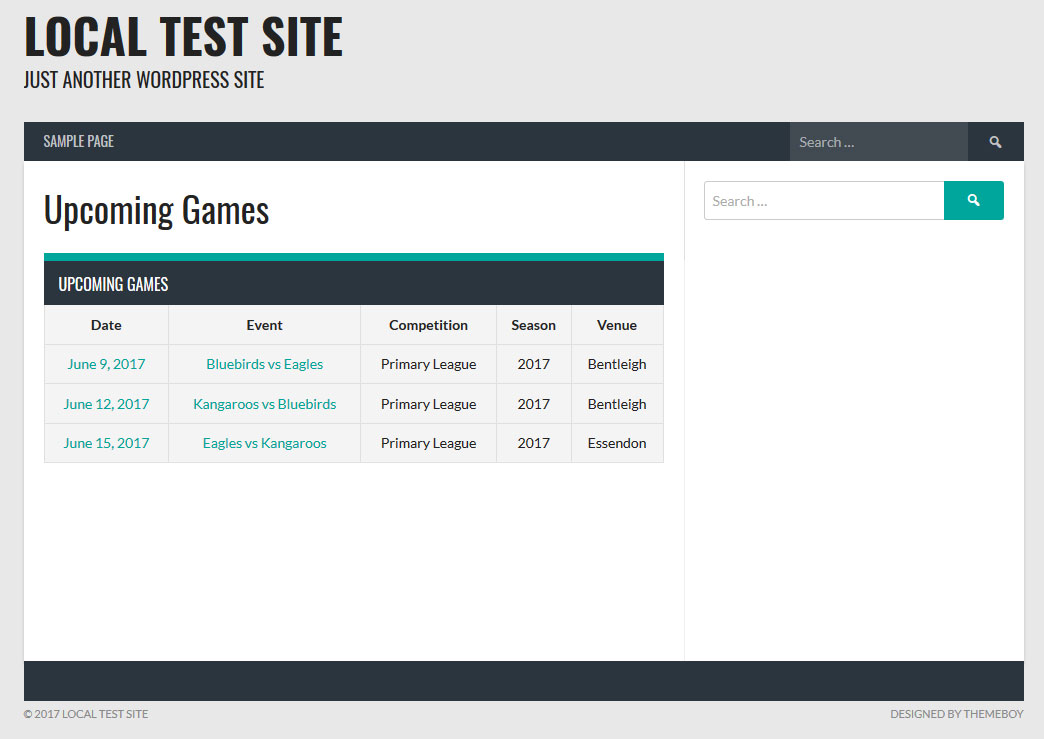
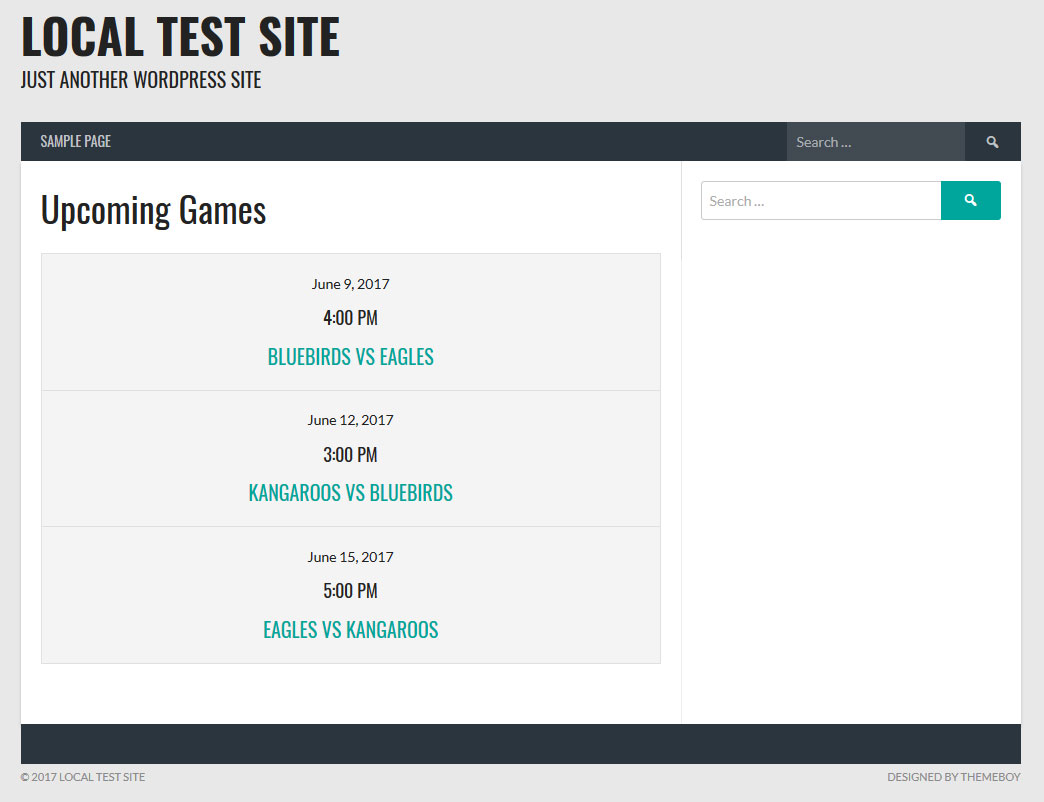
Here, we have two more layout options to choose from: list and blocks. To change the layout, simply pick one of them and hit the big blue Update button. However, when choosing the List option, make sure to check which columns you want to display under Columns first. Otherwise it will be pretty empty and disappointing to users. Once you have done so, here’s what it looks like:
The second option, Blocks, is another favorite for professional sports websites. When you pick it and update the page, you will see a very familiar sight.
And that’s it. These are the basics of setting up an event calendar for your sports team website in WordPress. However, SportsPress offers a few additional options which we will cover next.
Additional Event Calendar Options
While setting up a calendar was pretty easy, there are a few more things you can do.
Import the Calendar
Usually in SportsPress when creating league tables and other elements, you find shortcodes to display them in different places. Event calendars are no different, however, in this case you additionally find links to import your calendar into other programs.
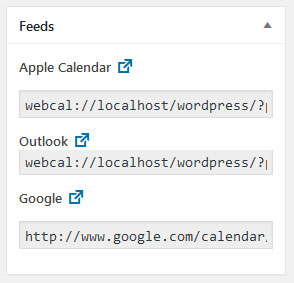
These links are in the ical format which means you can import them easily into Apple calendar, Outlook or Google calendar (or any other calendar using the format). That way, you can use use the links to easily share upcoming events with teammates or fans. Neat, right?
Change Settings
Of course, you can also further customize everything regarding events in the settings. Here’s what you find under SportsPress > Settings > Events:
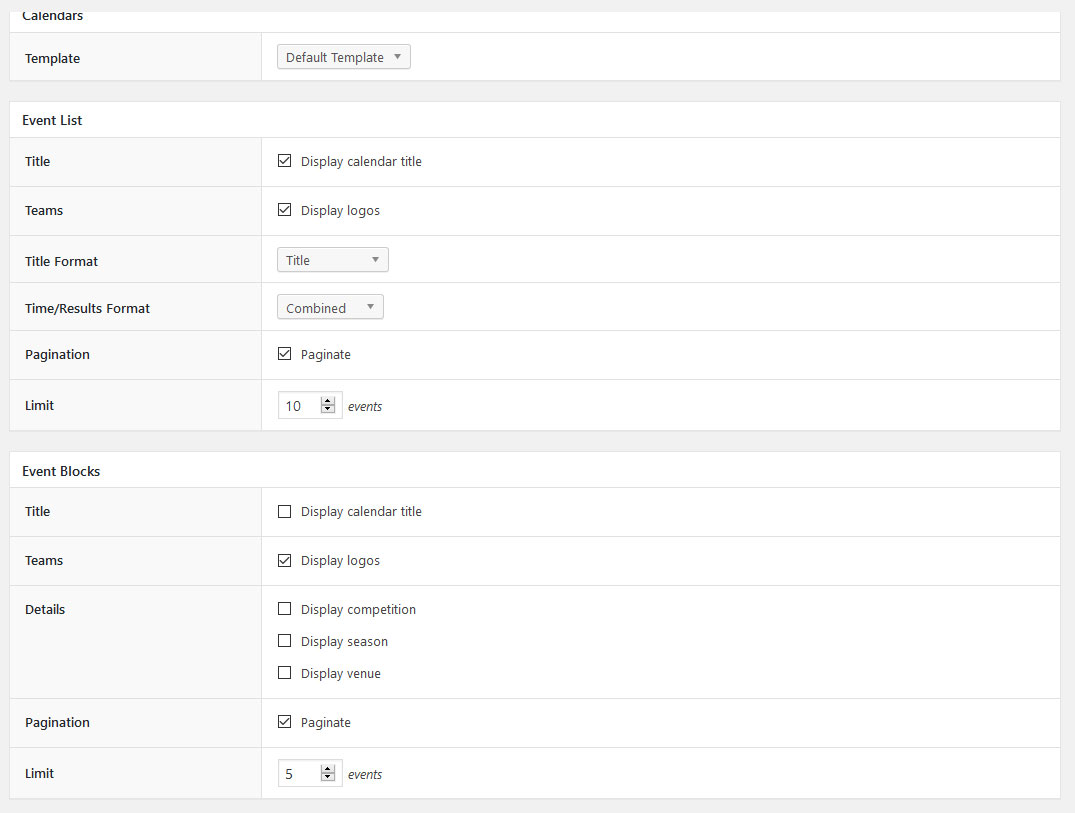
As you can see, the plugin allows you to change the template for your calendars. That is for themes that come with their own custom templates.
For event lists, you have the option to switch on and off the calendar title and team logos. In addition to that, you are able to customize the title format to show team names or a custom title. The same is possible for the time/results format. Finally, you can choose how many events to display and whether to paginate the list when it reaches its limit.
Similar options are available for block display with additional settings for which details to display.
Display as Widgets
Just in case you don’t only want to set up your event calendar or list as its page but also display it in other places like the sidebar, you can do so via widgets. After installing SportsPress you will find additional widget options under Appearance > Widgets.
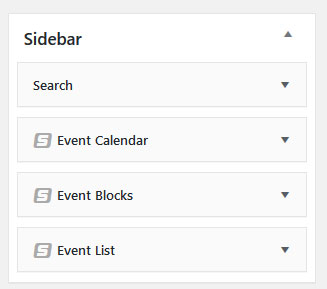
Event Blocks, Event List and Event Calendar give you the same option to display upcoming events as we discussed for pages earlier. Just drag them to the desired widget area, configure all options and save.
Summing Up
Upcoming events and competitions are among the most important things for sports teams. It’s what you train for and what fans look forward to, often for weeks and months. In short, it’s the lifeblood of any sport. For that reason, it’s only reasonable that they are displayed properly on your team website.
As we have seen above, SportsPress offers a number of different ways to do so and makes the process super simple. Just create a calendar, fill it with events and then share and display it on your site in numerous ways. All it takes is a few clicks.
We hope following along this tutorial has given you inspiration and understanding of how to show off your event calendar on your sports team website. Hope to catch one of your games soon!
Do you need more on your site than an event calendar? Good news! SportsPress is packed with features to create a professional sports team website. It’s free, too! Plus, if that isn’t enough, check out SportsPress Pro for even more good stuff.
