How to Add Player Profiles, Galleries & Statistics to Sports Team Websites

A while ago we talked about how to add team profiles to your WordPress sports team website. Team profiles are a cool way to show off your entire team, what you are about, what you have achieved in the past and more.
However, besides the full team, it’s just as important to highlight the individuals it is made up from — the players. There are many ways in which you can pay tribute on your website to the people playing on your team and in this article we want to highlight a number of them.
In the article below, we will first concentrate on how to create player profiles on your team website and supplement them with statistics about each player’s performance. Then we will take a swing at player rankings and galleries and end with showing you how to display team lineups for events.
Sounds like a lot? Don’t worry, it’s easier than it sounds.
First Things First: Install SportsPress
In order to do everything we mentioned above, you first need to install SportsPress. The plugin comes with all necessary features out of the box and will make this process much easier.
To install SportsPress, log into your WordPress website and go to Plugins > Add New. Here, search for the plugin via the search field in the upper right corner. The first result should be what you are looking for.
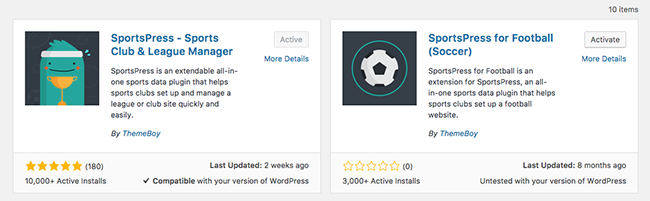
Click Install Now and wait until it’s finished, then activate the plugin with one more click. Well done!
Next up, you will see the setup screen. Here, pick your correct timezone, the sport your site is about and whether to install demo content in order to help you understand how everything works. Save the changes and wait for the success message.
Nice! Now you are ready to get started.
How to Add Player Profiles and Player Statistics
The first thing we will do is create player profiles. For that, we need to create players. Naturally, this happens in the Players menu.
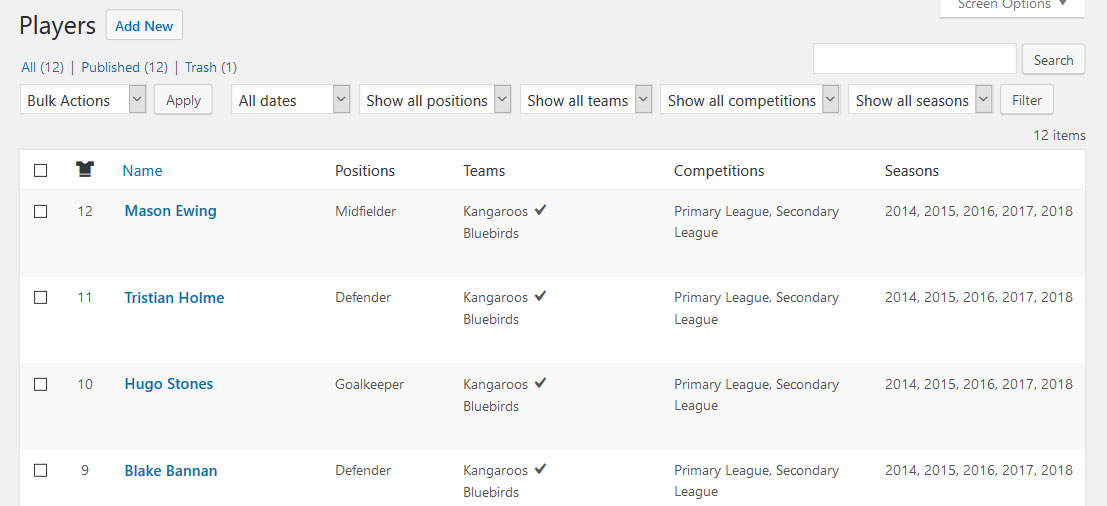
Here, you can find all players that already exist on your site (for example, if you chose to include the demo content earlier) and also start creating new ones.
Creating a New Player
To add a new player, click the big Add New button at the top. The first thing to do is add a player name in the bar on top. Below that you can also add a description with more information about that team member.
Since we are talking about WordPress, this can also include images, videos and other media and you have the option to add formatting to the text.
After that, it’s time to fill in the details column on the right.
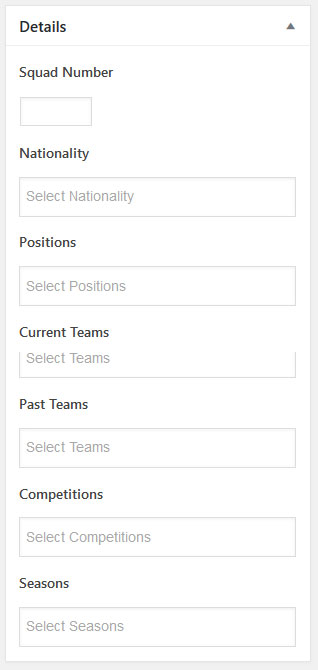
Here, you have the following options:
- Squad number — The number the team member competes under
- Nationality — The country he or she is from
- Positions — Positions your player fills in the team
- Current Teams — Team(s) he or she is currently playing for
- Past Teams — Teams that player used to be active for
- Competitions — Current and past competitions
- Seasons — Active seasons
Note that in order to have options for some of these, such as positions, current and past teams, competitions and seasons, you have to have created this kind of data in other menus beforehand.
Once done, you can optionally fill out the height and weight under Metrics and add a photo. Don’t worry about the statistics box for now, we will deal with that later on.
One more thing before we are finished: In the Publish box on the upper right, you can input the player’s birthday. Just click on Edit behind the respective option, fill in the date and hit Ok.
When you are done, use Save Draft or Publish to finalize your player. Once that has happened, you can preview or view the player profile.
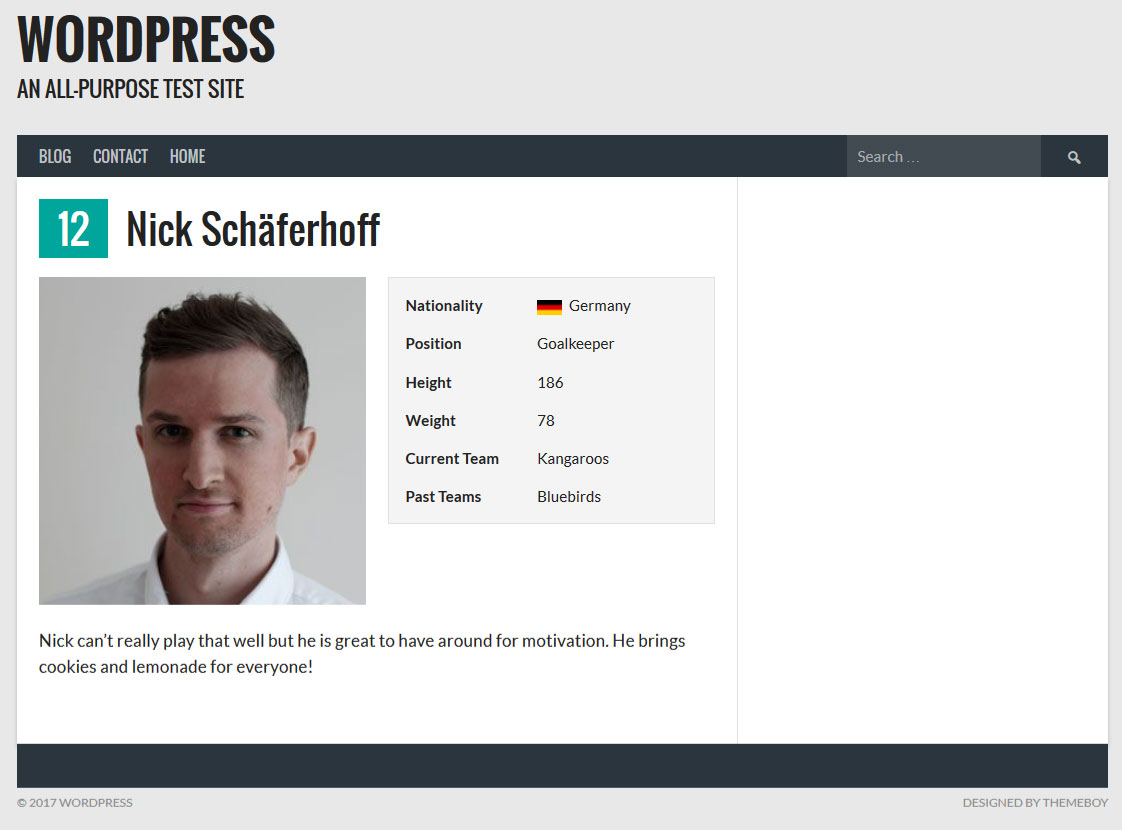
Already looks good, doesn’t it? It’s about to get even better.
Adding Player Statistics
After saving or publishing you player, you might have noticed the new Statistics section in the WordPress backend.
This is automatically populated with data from the teams, competitions and seasons you have chosen earlier. You can show the goals, assists, penalties, appearances, wins, draws, losses and more of your player both in the current team, seasons and competition as well as their entire career. The available options will change depending on your chosen sport.
For the current stats to show up, you first need to use the drop-down menu to choose the team your player was active in in each season. After that, fill in the options data like so:
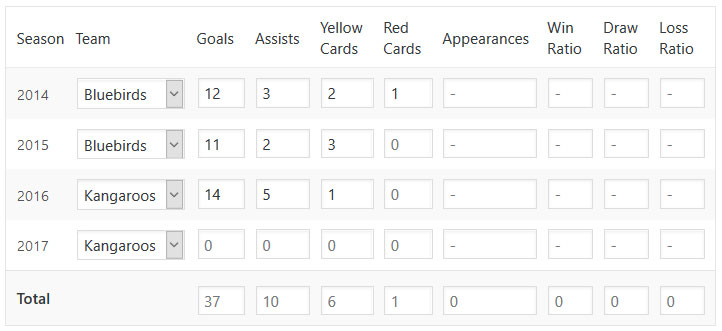
Note that the section will automatically calculate total numbers from the input you give. Also, some of the fields (such as wins, losses and draws) might get filled in automatically from the team data already present on the site.
After saving, the player stats will now show up on the profile.
You can do the same with total career statistics. Just tick the box of the season you want to display on the player profile and fill in the data for it. Once saved, this will also be visible on your homepage.
Keeping player stats updated is just as easy. After every match, simply go to the profile, update the numbers and save. The changes will automatically show up on the front of your site.
If you’re adding fixtures and results to your site, these statistics will update automatically without the need to manually edit each player. In this case, be sure not to edit the Values table with black text (leave it gray), and instead us the Adjustments table to make any adjustments to the automatically calculated statistics.
Configuring Player Options
Under SportsPress > Settings > Players you find a lot more options adjust player profiles to your liking. They are quite similar to the options you have for creating team profiles, but let’s go through them one by one:
- Template — Here, you can pick a layout template for player profiles that are included in themes
- Layout — Enable/disable profile elements at the touch of a button and change their order with easy drag and drop
- Tabs — Drag items from the layout section here to display them on top of one another as tabs
- Link — Determine whether mentions of the player names link to their profiles
- Details — Tick the boxes for details you would like to display or not on your player profiles
- Columns — Pick whether to select columns on the profiles manually or display them automatically
- Statistics — You can have offense and defense statistics either displayed combined or separate and in whichever order you want
- Total — Determine whether or not to display the career total statistics of your players
- Nationality — Switch on and off the display of the flag of your players’ country of origin
- Birthday — Show or hide the birthday and age of players on your site
That’s it for player profiles, we will now move on to player rankings and galleries.
Adding Player Rankings and Player Galleries to Your Site
Player rankings allow you to display players ordered by many different factors. Want to show off your top scorers? No problem. Shame the ones with the most penalties? Also possible. Here’s how.
Creating a Player List
To create player rankings, we first need a player list. You can set those up under Player > Player Lists. Once here, select Add New at the top to get started.
Start off by giving your list a name and an optional description. Both will show up on the frontend later. Also, make sure that List is selected under Layout (we will get to galleries later on).
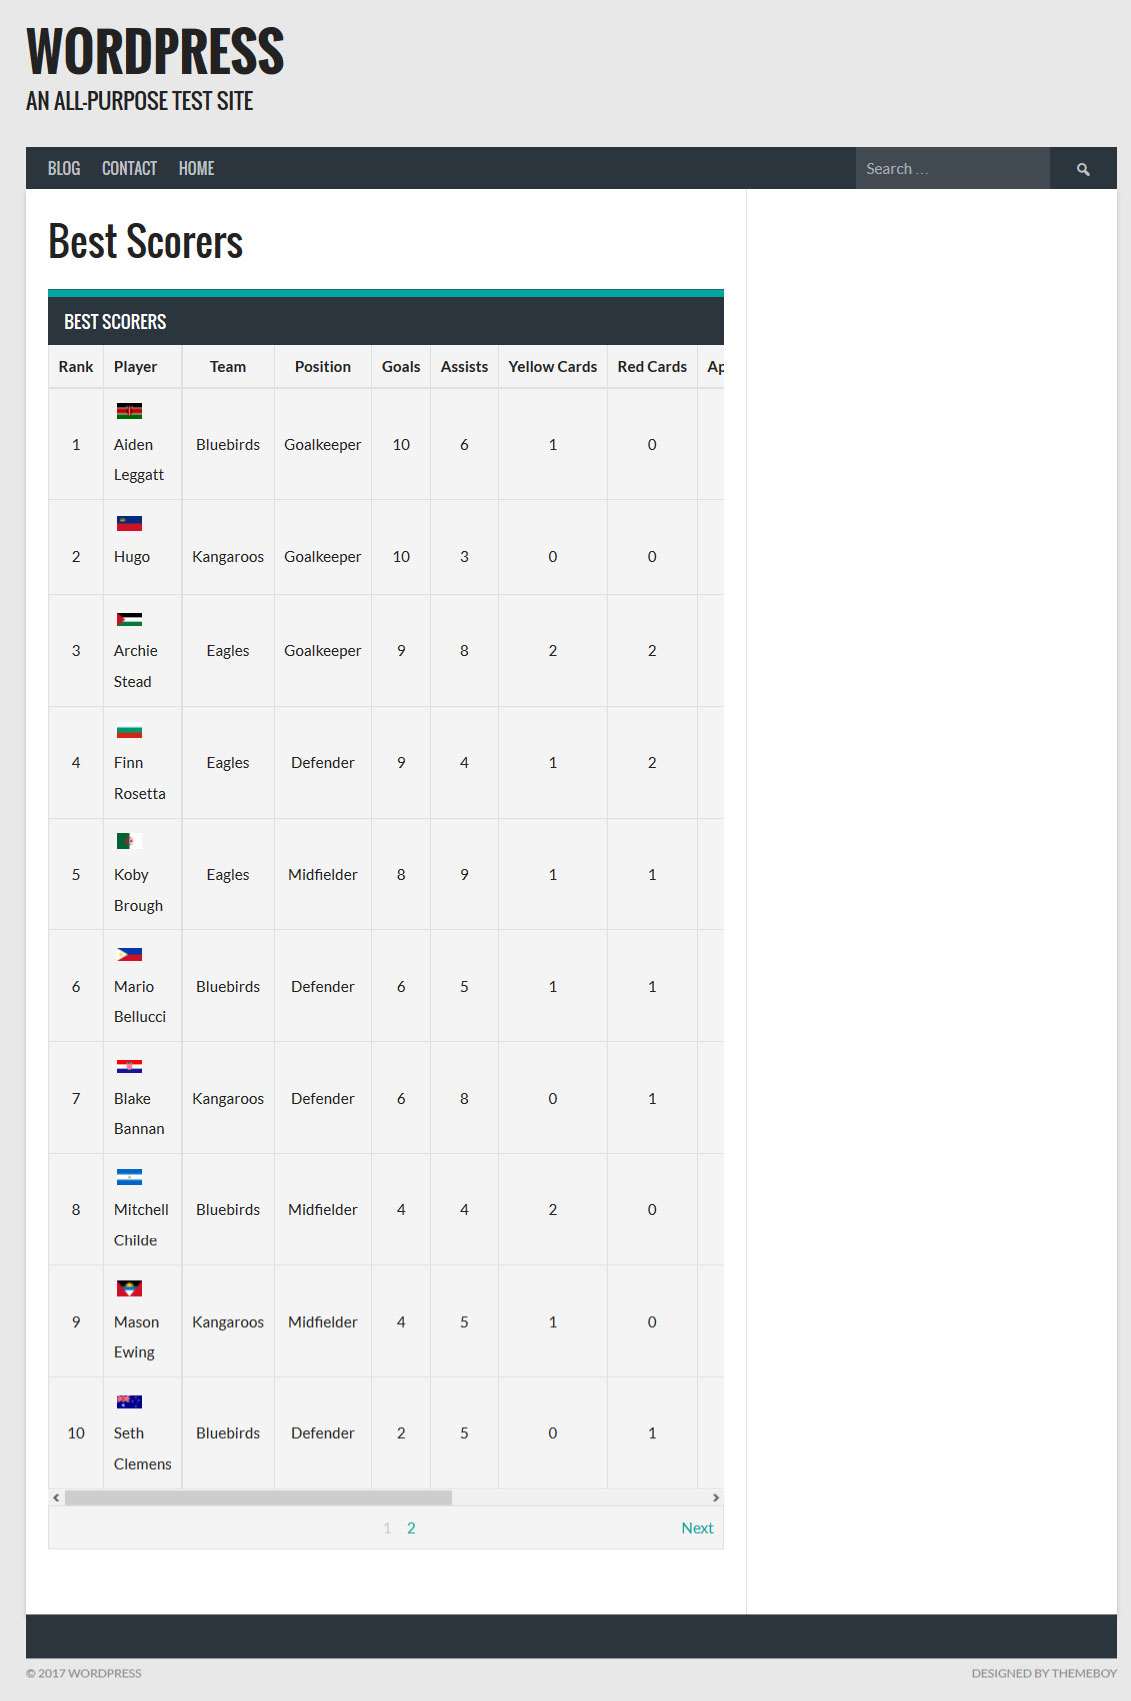
As mentioned, lists can be ordered in many different ways such as by squad number, name, number of appearances, goals, penalties and other data depending on your sport. This way, you can create very individualized player rankings for many different purposes.
You can control which metrics to show on the frontend of your site in the Columns panel.

Here, choose which information to convey in the player list such as team, position and player rank, player performance metrics, statistics and more. However, the choice for which metrics to rank your players by happens under Details.
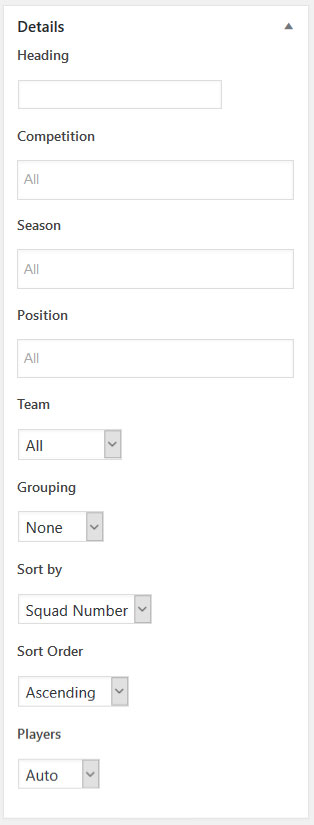
Yet, before we come to that, first pick the competition and season to draw players from, whether to limit them to a certain position and/or team or group players by position.
After that, it’s time to pick what to order them by. You have many options, from squad number and name to goals, weight and penalties. The availability of data depends on the sport you have chosen.
When you have taken your pick above, choose whether to rank players in ascending or descending order and if you’d like to select players manually or fill the list automatically.
Once you have made your choices, save or publish the list. Once you are at this stage, you can take a first look at your player ranking via preview/view.
We will show you how to display this list anywhere on your site in a little bit. But first let’s talk about player galleries.
How to Display Player Galleries on Your Site
Player galleries are another option to display players on your site. These are image galleries of your players plus their name. When you click on the names you can also access the individual profiles.

When you have a player list, creating player galleries is quite easy. All you need to do is switch the option under Layout to Gallery. Everything else is basically the same with the exception that you can’t display any of the Column metrics. However, ordering players by those metrics is still possible.
Once you have made your changes, just update the player list to turn it into a gallery.
Displaying Player Rankings and Galleries
Displaying player rankings and galleries anywhere on your site is as easy as anything in SportsPress. Firstly, you can simply copy the shortcode in the player list and paste it anywhere you want it to appear.
Aside from that, you may use the SportsPress button in the WordPress editor.
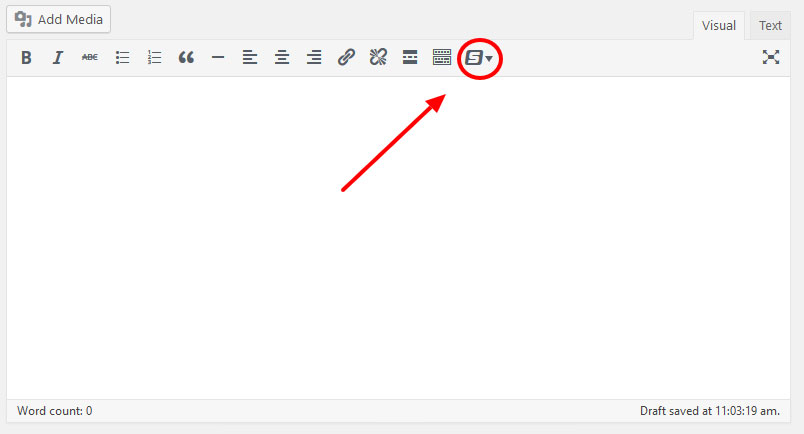
Simply go to a page where you want your list to appear, click where you want to place it, then click the button. From here, choose Player > List or Player > Gallery to get to this menu:
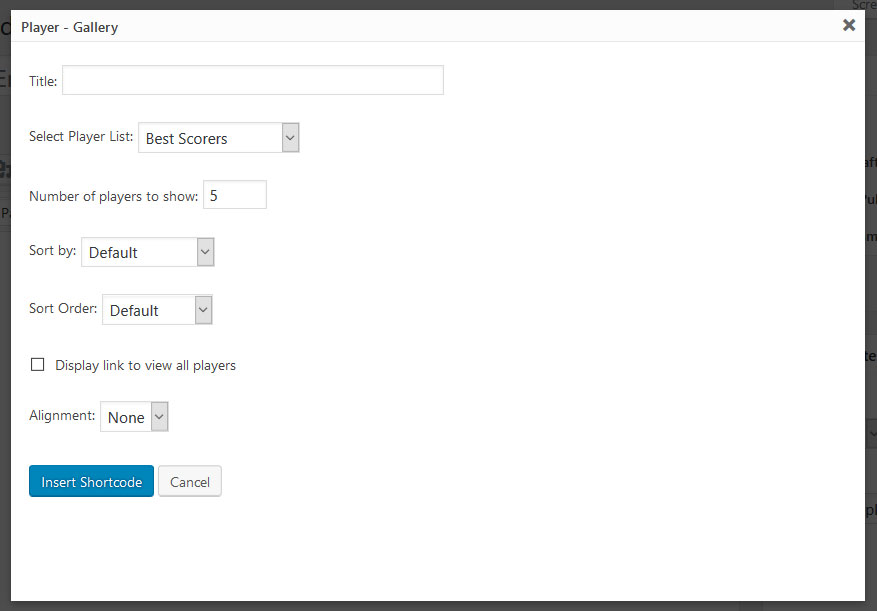
Optionally insert title, select your player list from the drop-down menu and fill in the rest of the options. Once done, choose Insert Shortcode, publish the page and you can view your player ranking or gallery in action. Nice job!
Gallery Options
Besides the individual display options we saw above, player lists also come with global settings. You find them in the same place as the other player profile options (SportsPress > Settings > Players).
Here’s a short breakdown of what each item means:
- Template — Pick a pre-made template for the display of your player list
- Title — Choose whether or not to display the title of your player lists and galleries
- Players — Select if you want to display player photos and/or the national flags of their home countries
- Pagination — Switch pagination on and off (it means the option to move player profiles to a new page once the limit of players to display is reached)
- Limit — Select how many players to show in your galleries and lists
All good? Then let’s talk about team lineup next.
Displaying Team Lineups on a Sports Team Website
Our final way to show off players is in the form of team lineups for events. Here’s how to do it.
First, go to Events > Add New. Once there, no need to set up a title, SportsPress will do that automatically depending on the teams playing in the event. However, feel free to add a description.
After that, turn your attention to the Details box.
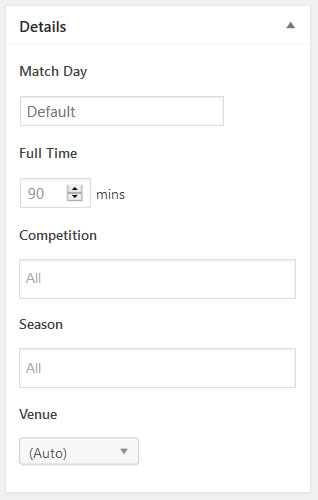
Here, fill in the match date, length of the game, competition, season and (optionally) venue.
After that, it’s time to pick the competing teams. This happens, you guessed it, in the Teams box.

Use the drop-down menus to pick from the teams present on your site. Once you have made a choice, SportsPress will fill in the list of available players in each team.
From here, pick the players that will take part in the event (and that you want to display in the lineup). After that, optionally add a featured image or video for the event and then save or publish it so you can preview/view it.
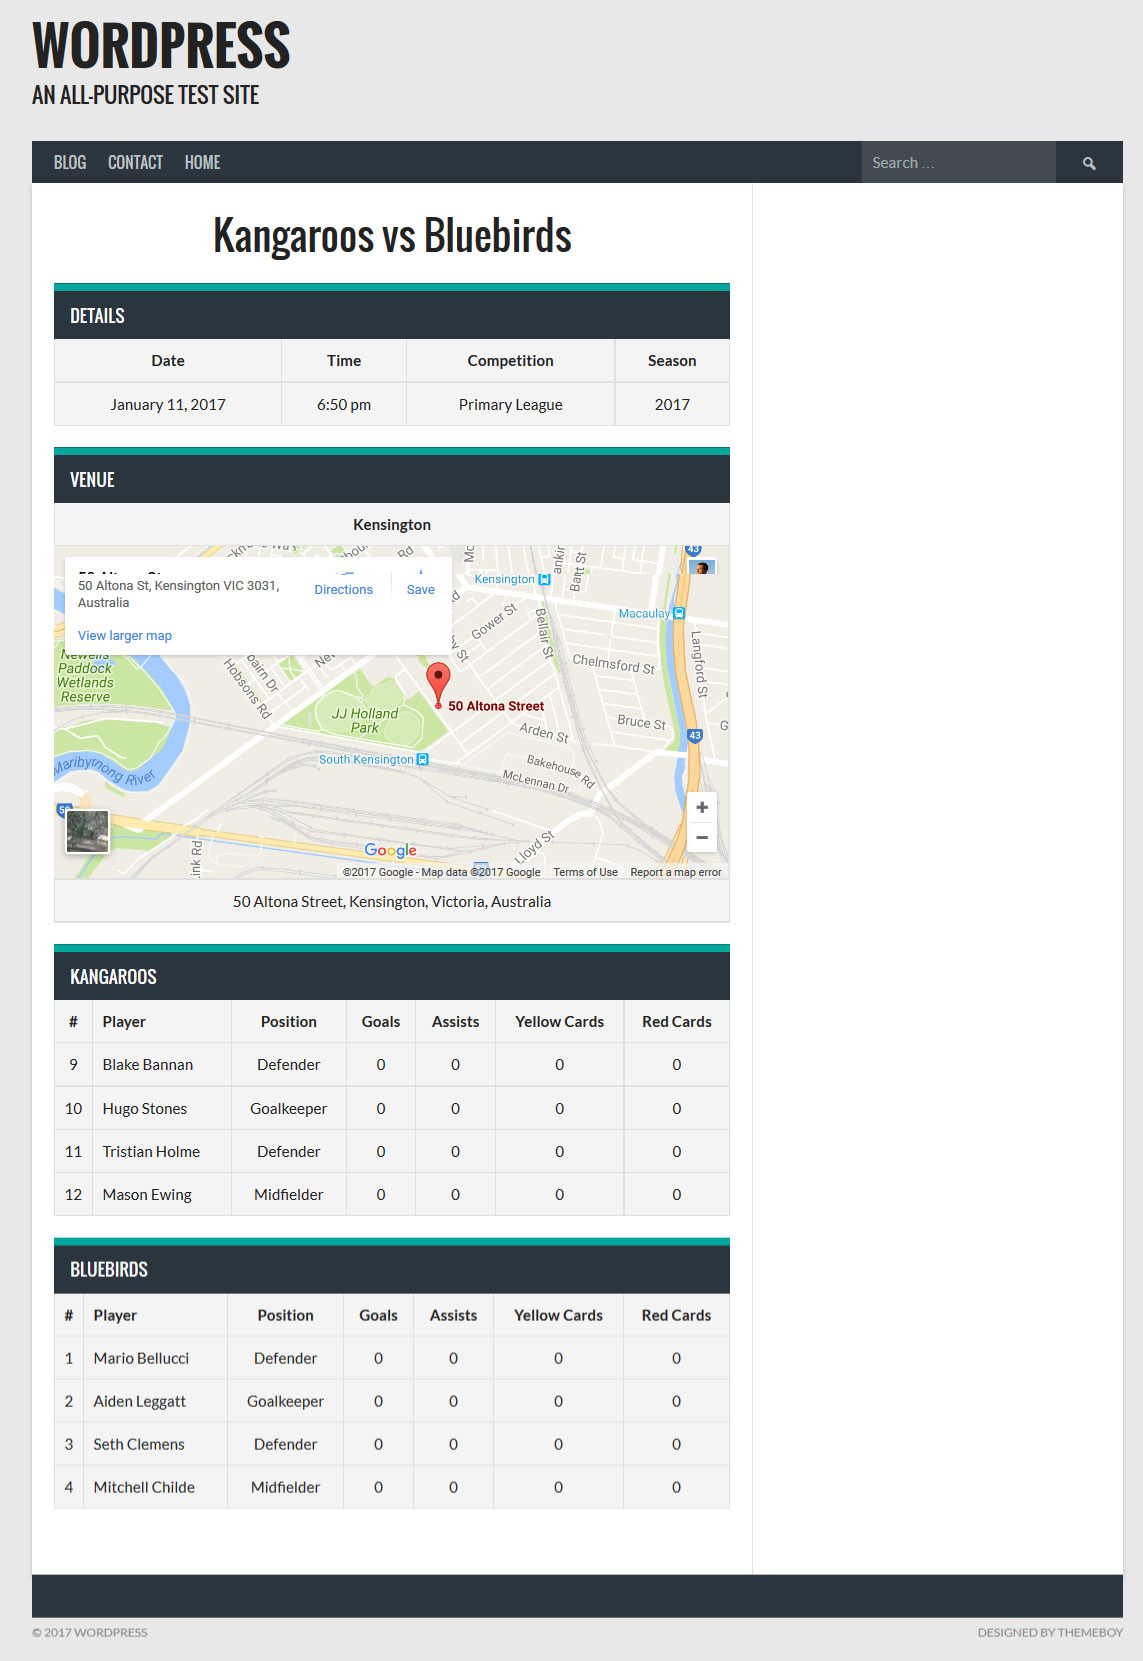
As you can see, the player lineup is automatically added to the event. That wouldn’t happen if you didn’t choose any players in the event configuration. If you want to change the order of the lineup, you can do so under Box Score by clicking on the three-striped icon to the left and dragging the players to the position you want them to have.
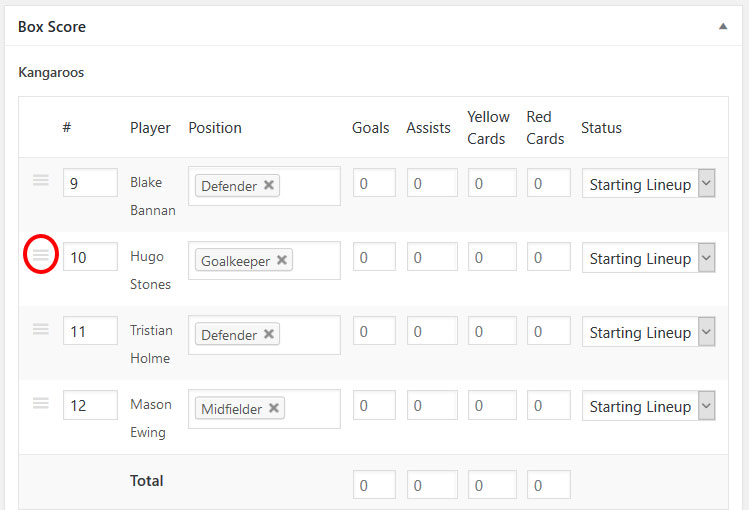
In the same place you can also update player goals and other data once the event has started (or finished) and determine whether players are in the starting lineup or playing as substitutes.
That’s it already. Easy wasn’t it?
Summing Up
In team sports, naturally everything should be about the team. Sports teams are supposed to work together as one unit, strive together for the best and be celebrated as one.
However, at the same time it’s important to shine the spotlight on the individuals that make up the whole. In the article above, we have shown you how to add player profiles to your WordPress website and display players in the form of ranked lists, galleries and player lineup.
This way, you can show off who is on your team (and other teams) with images, statistics and a lot more information. Fans can follow their favorite players and stay up to date on how they are performing.
At the same time, players will appreciate to be displayed on the official team website. Overall, it’s a win-win situation for everyone.
Need more features for your sports team website? Check out SportsPress Pro. Chock full of functions to take your team’s website to the next level and create a professional web presence.
