How to Take Awesome Sports Team Photos for Your Website
Lately, I have been talking a lot about building your sports team identity on the blog. We looked at how and why to design team logo and how to improve your team’s website.
It’s not only important to create an identity around your team, but what also counts is capturing the essence of your team itself and there is no better way to do this than by taking some great photos.
Just look at the pros. Every year, professional teams publish their official sports team photos and player portraits.
Not to mention the hundreds of images from games, tournaments, wins and other occasions they publish throughout the year on their Facebook team pages and other marketing channels.
For good reason. Photos and other visuals are one of the most effective types of content on the web.
Yet, it doesn’t stop there. Photos of your team and players are also a great resource to have for your marketing and club promotion material.
After all, that’s what a team is all about — people.
In this article we will go over how to create stunning team, player and action photos for your website and wherever else you might need them.
Sound good? Then buckle in, we’ve got lots of useful tips to help you prepare for your next photoshoot.
Quick note: I’m going to assume that you will take your own photos. If you hire a professional photographer, much of the stuff below doesn’t apply because he or she would hopefully take care of it. However, it will still be useful to you to read on for creating ideas and a concept even if the execution is up to someone else.
Find Inspiration in Other Sports Team Photos
The beautiful thing about our multi-connected world is that you almost never have to start from scratch. In most cases, you can find examples and information of what you are trying to do online already.
Team photos are no exception. In fact, since they are a necessary component of a professional sports club website, you’ll find plenty of sources for inspiration.
Good search queries to start with are:
- “sports team photos”
- “sports team photo ideas”
- “[your sport] team”
- “[your sport] team picture poses”
- “[your favorite team] official team photo”
- “[professional league] player portraits”
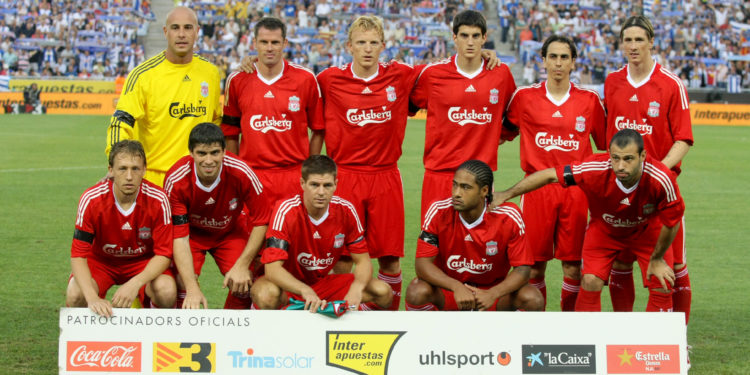
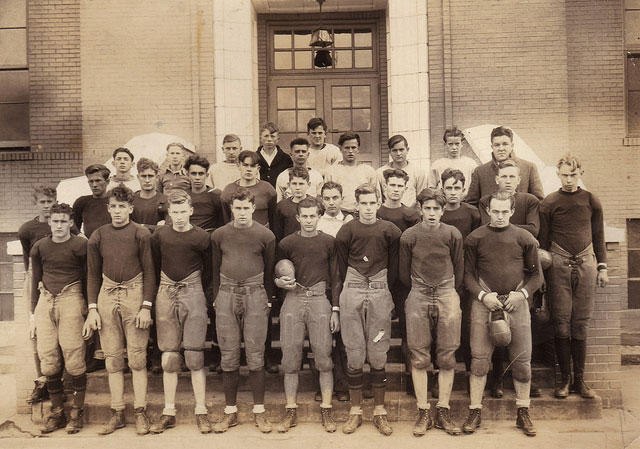
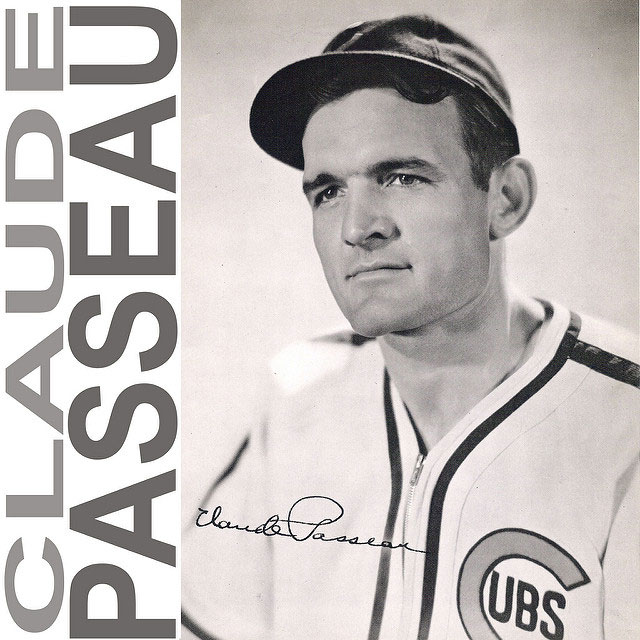
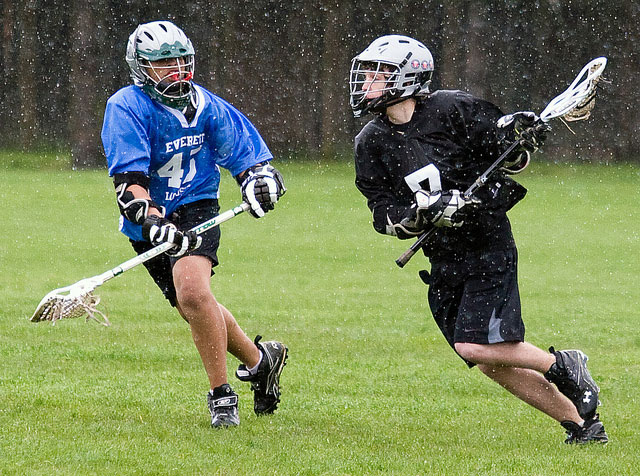
Here are some examples of what you will see:
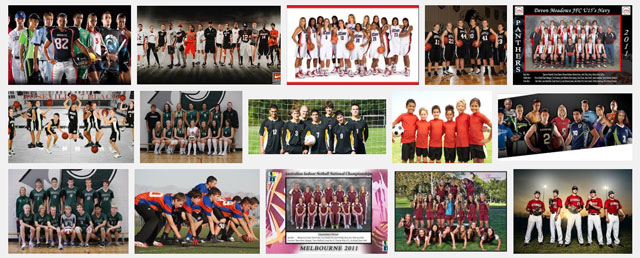
The purpose of looking at existing examples is for you to start thinking about the style and direction you’d like to take with your own photos.
It will help you understand and become clear on what you like and don’t like in other sports team photos so you can develop your own vision for your team.
Plus, it’s always a good idea to see how professionals do it in order to understand existing best practices. Together, this will provide you with a good base to start from.
General Preparation Tips for a Smooth Photo Shoot
Before we get into specifics for different types of photos, let’s go over some general guidelines how to make your photography session a success.
Find a Photographer
How original, right? However, it should not be forgotten that the the first step to a good team picture is someone who actually knows how to take one.
Whether that’s you, someone on your team or an external helper, doesn’t matter too much.
Just find someone who knows how to handle a camera properly and — if at all possible — has their own equipment.
Get Proper Photo Equipment
Since we are on the topic: the quality of your photos really hinges on what you take them with and a point-and-shoot camera just won’t cut it for this one.
This doesn’t mean you have to invest in a $5000-camera. Even cellphones are well equipped for taking photos these days and can create really good pictures.
However, for the following we will assume you are using a real camera for your team photos with lenses and everything.
Any additional equipment like lighting rigs are also welcome, however, you will also find some tips below on how to build such things yourself if necessary.
Make a Plan
In photography, preparation is everything. It’s easy to underestimate the logistics that go into a photo shoot and having a plan is therefore key.
In particular, think through the following:
- Location — Where will the photo be taken? Can you get there without a problem? Do you need permission or keys to get inside? There’s no use scheduling taking your photos somewhere you can’t access.
- Timing — Besides the where, the when is just as important, mostly so everyone who is supposed to be in the picture can be there. Game day is a good option (since everyone will be in uniform already), however, it’s important that the photo shoot is communicated in advance and you have enough leeway before the action.
- Equipment — Besides the photo equipment like camera, batteries, lenses, memory cards, tripod and remote (if the photographer also needs to be in the picture), think about clothing and props like sports equipment that will liven up the photos.
- Assistance — Doing an entire shoot alone can be a tall order and having some help might be a good idea. An assistant can arrange subjects (i.e. players), help with the lighting and do other tasks. Trust me, having someone else who there helps with the organization can make things a lot smoother.
We will get into some of these points in more detail further below, but you can already see the importance of planning ahead, right? Cool, then let’s get to the actual photos now.
How to Take a Great Team Photo
The photo of the entire team is probably the most important one. It shows who is part of your group and represents your entire club to the outside world.
For that reason, it’s also important that it’s not just the players who get their space in the shot but also everyone else who is important like trainers, staff and others.
After that, it’s all about execution.
Find a Suitable Location
Where the photo is taken matters for two reasons.
For one, it determines the background of the photo, which is why you will probably want to go for something meaningful yet not too distracting.
Your home arena or stadium are good options. They will add an extra layer of identity and also allow for a clean shot, which is why many professional teams opt for this motif.
Secondly, lighting should be taken into consideration when seeking out the best location. If you don’t have the equipment to properly light an indoor area, you are probably better off taking the photos outside with natural lighting.
Pick the Right Light
When taking a photo outdoors, light is mostly a matter of timing. Generally, you want to try for bright and even lighting.
It is best to avoid the middle of the day and direct sunlight from the front in order to minimize eye squinting or everyone in the picture might end up looking slightly annoyed.
Sunlight from the side is also suboptimal as it will result in deep shadows in the players’ faces.
The best case scenario is to have the sun coming from behind the team. However, you may need someone to protect the lens (this is where an assistant comes in handy) or use a flash.
If you’re planning to take indoor photos, check out the section on individual player portrait photos for lighting tips.
Fit the Team Into the Frame
While it’s absolutely possible to go a little crazy with the your photos (bring out the clown noses) to capture your team’s personality, for the first couple of shots you might want to go with a classic team group pose. After all, you can never go wrong with looking professional.
For that, it’s a good idea not to put all players in one line. It will make your image very wide and the faces in the picture too small.
Instead, layer several rows of people (even three or four if necessary) behind one another to get a more compact shot.
Taller players in the back and shorter ones in the front, with the back rows filling in the spaces in front of them. You know the drill.
A rope on the ground can be used to make sure the rows are straight. Also, don’t put too much space between them to ensure an even focus.
Important people, like the coach or goalkeeper can be either placed in the middle or flanking the outside, depending on how many they are.
People in the first row can be kneeling, the second bending down and third standing up. Alternatively, you can also put a bench in the back and have the last row stand on it.
You can spread out the last row slightly for a nice frame.
Get Into Position
When it comes to camera position, make sure to get close enough so that all players are in the picture without a lot of dead space around them yet some margin on all sides.
Don’t move too far away. While you can crop the image later, you run the risk of having the heads appear too small.
Getting in close also enables you to capture more details in the faces, which really improves the shot and makes it more lively.
For an even more professional approach, use a long lens, move a bit away and then zoom in. That way, the players will come out an even size.
Strike a Pose
As I said before, you can go crazy here if you want to. Jump, scream, all look to one side, do whatever you want. The important part is that you agree on a pose to make the image consistent.
It doesn’t have to be original or complicated. Put your hands behind your back, on the side, on your knees or anything. The pose can even change from row to row. Just make sure it is consistent.

Also, pro tip: Have the players raise their chins a little bit in order to avoid double chins. They will thank you.
Taking the Shot
When you finally push the button, it’s important to get everyone to look at the lens and thus the viewer. Of course, this is easier if you let everyone know about it by counting down.
Also, take several pictures so you have more than one option to choose from. You can check the results on your camera and even do several sessions with pose changes.
Take a classic shot first and then move on to more crazy poses if you’d like. Nice going! Now on to individual player photos.
Taking Team Player Portraits
Player photos are just as important as pictures of the entire team, especially if you plan on setting up a team roster or player profiles on your site.
However, taking individual photos of each player has different considerations than getting a group photo.
Create an Even Background
For player portraits, it is even more important to have a consistent backdrop, otherwise it will spoil the feeling of unity.
You can either use a real background like your locker room or a one-colored backdrop.
The latter might be a better option because you can recreate it more easily in case you need additional pictures for new players.
Don’t worry if you don’t own one, backdrops are easy to make by yourself as can be seen here and here. You can even built a rack for cheap as this DIY version shows.
Apart from that, it is also probably best to take players photos inside so you can create consistent lighting throughout all of them.
Provide Balanced Lighting
Portrait photos need a well-lit environment. However, rather than harsh light (which also results in harsh shadows), go for soft, indirect and diffused light.
That doesn’t mean you need to invest in professional equipment. Light can easily be softened by putting parchment paper in front of the bulb building a DIY softbox and using other self-made photography equipment.
As a general guideline, put one main light in front and slightly to the side of the subject. A reflector on the opposite side can be used to balance it out. Then, use a less powerful light in the back to put the focus on the person and not the background, like so:
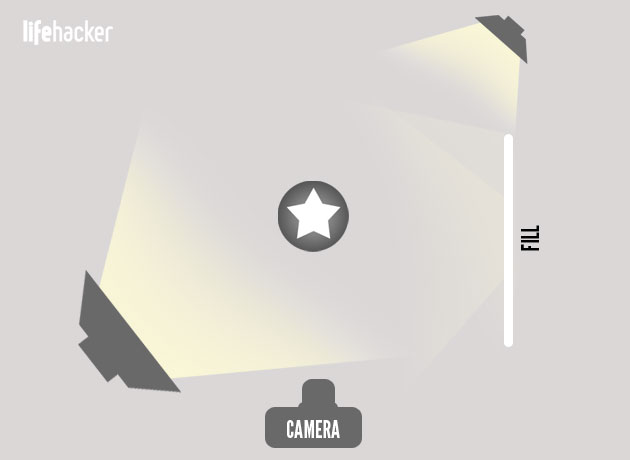
For more detailed instructions, read the accompanying article to the image above.
You can also use a flash if necessary, however, never go with the on-camera flash! It will give anyone a deer-in-the-headlights look and that should be reserved for your opponents during a match.
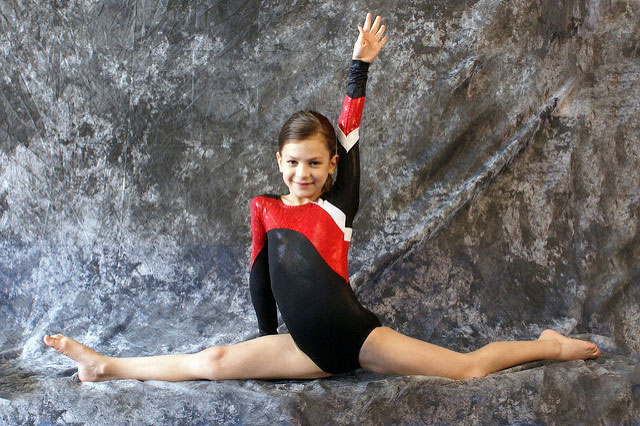
Find the Right Camera Position
For portraits, it makes sense to place players relatively close to the camera in order to create a shallow depth of field. This will keep the subject in focus and everything else out of it.
To make recreating the same shot over and over easier, you can mark the position where players are supposed to stand with tape on the floor.
As for how to portrait the players, you can experiment with different motifs:
- Only head and shoulders
- Full upper body
- Entire body
- Facing from the front
- Captured from a slight angle
Again, the choice is up to you but make sure you go with the same motif for everyone.
What’s a Good Pose?
Having everyone make the same pose will make you look more like a team and definitely more professional, too.
It doesn’t have to be anything fancy. Simple is always best as it should be easy to recreate for any new players joining the team roster.
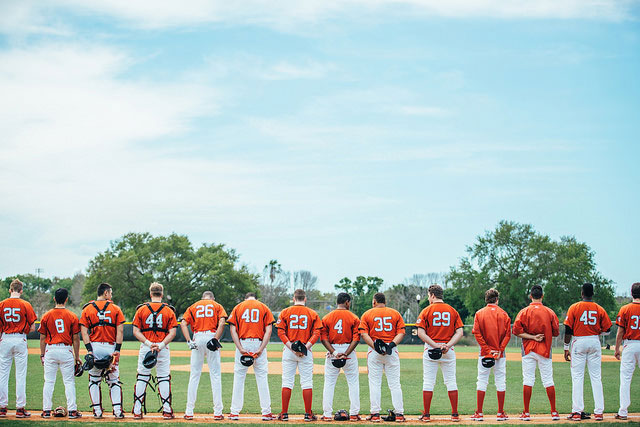
A good example of this is the arm folding for the FIFA world cup:
While it doesn’t always go well, you have to agree that there is a consistency to it. Take some test photos before settling on your pose to see if you are satisfied with the result.
Camera Goes Click
The moment you take the shot is not so different to taking a team photo. Make sure players look into the camera to connect with the viewer and have them loosen up between shots for more natural pictures. That’s it.
How to Take Action Photos for Your Team Website
Lastly, let’s talk about action photos. These can be pictures from games, tournaments, title celebrations and other occasions where there is a lot of excitement.
Action photos show what your team can do and are excellent fodder for a blog or social media.
On the other hand, this type of photo can be the most challenging to create if you don’t know what you are doing, so heed the following tips.
Things to Keep in Mind
The most important thing for taking action photos is that you are familiar with the sport you are trying to capture.
That way, you can anticipate what is going to happen and can more easily position yourself where the action is likely going to be.
Since we are talking about your own team, this shouldn’t be a problem but it’s still worth mentioning.
Apart from that, be sure not to miss out on what is happening by constantly checking the photos you have already taken.
With digital cameras there is no waste, so you can take as many images as you need and pick the best ones later.
Useful Tips for Your Camera Setup
As you can imagine, action photography is all about speed. In camera terms that means working with higher shutter speed. Aim for 1/500 to 1/1000 of a second, to avoid blur.
If you don’t feel comfortable setting the shutter speed manually, many cameras have a shutter priority mode which will take care of it for you.
For the real beginners (like me), there is sometimes even an “action photo” setting.
What’s also important for action photos is that you let in enough light.
That means you need to open up your aperture, often as wide as possible, and crank up the ISO, especially at night.
Depending on your camera, many of these things can also be set to automatic.
Also, when capturing movement, burst mode is naturally your friend. Just be sure to shoot in short bursts so you don’t fill up your memory card too quickly.
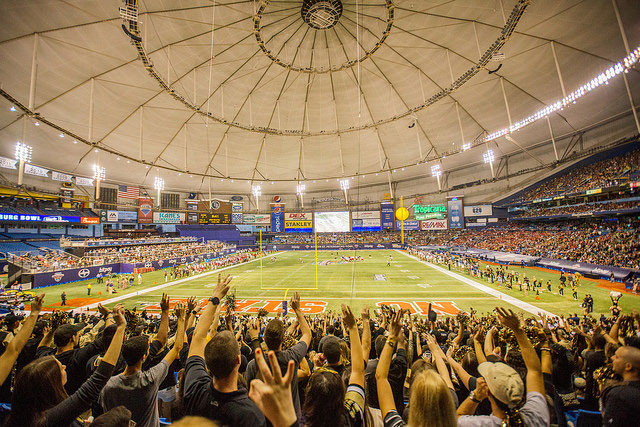
Action Photography Motifs
When going for action shots, whatever is going on on the field (or wherever your sport is taking place) is an obvious motif. Goals, tackles, shots, you name it.
However, things that happen outside the main event like warm up sessions and after-game cheer can be just as interesting.
Another great way to capture the spirit of an event are the interactions on the field (think huddles, high fives, celebrations) and emotions in the players’ faces.
Sport is not just about what happens on the field but also the fans who are cheering on the sidelines. Therefore, don’t forget to turn the camera toward them every now and then.
How to Shoot Action Photos
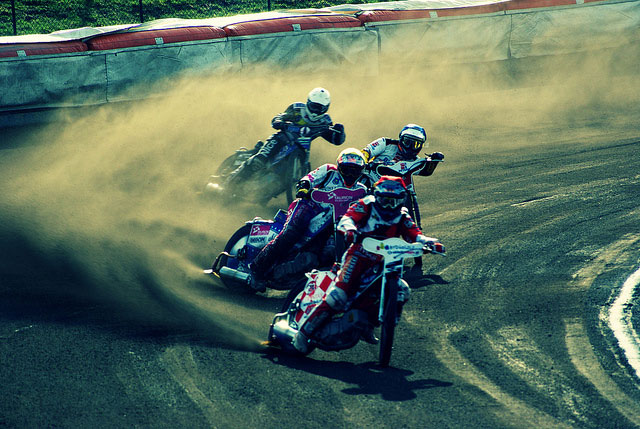
Action photography is all about experimentation. Feel free to be creative, for example, using different angles and positions instead of shooting everything from eye level.
You can also mess around with other settings, like slower shutter speeds that will keep the player in focus but blur out the background, which creates some very dynamic shots:

Again, try to have a clear focus of the picture and not too much going on that will distract from the main motif and you are well on your way. Have fun with it!
A Quick Note on Photo Editing
In past times, you would just fill up your film role and hope that they images come out well. With digital technology, much of the real work actually starts after the pictures are taken.
Photo editing is a science in itself and professionals spend years honing their craft. However, even with just rudimentary editing skills, you can really polish up your images.
I personally use Photoshop for everything related to image retouching, but there are also some excellent free alternatives:
Often, it’s enough to merely play with lightness, contrast and saturation to spruce up your images. For more advanced stuff, be sure to check out these beginner articles:
- Photo Editing for Beginners: A Guide
- Best Photo Editing Tips for Beginners (six-part series)
- 55 Photo Editing Tips and Tricks to Live By
Again, you don’t have to dive too deeply into this topic. Just the basics are enough for the beginning. On the other hand, if you want to learn more, don’t let me keep you from it!
Ready to Take Your Own Sports Team Photos?
Including photos on your sports team website is important for both improving the site as a whole and representing your team to the outside.
Fans want to see more of their favorite players and opponents should be able to look into the eye of who they are coming up against.
However, for non-professionals, creating high-quality sports team photos isn’t always easy especially since taking a group photo, individual player pictures or action photos at games and events all have different requirements.
The tips above will help you get started and achieve decent results in all three categories, even if you are an amateur.
Good luck and we hope to see your team online!
SportsPress is the ultimate WordPress plugin for creating sports team websites with tons of useful features. If you are interested in building your own professional sports club website or have additional question, we would love to hear from you.
Image credits: John, SuperCar-RoadTrip.fr, Mike Morris, roovuu, CityofStPete (and this one), Green County (and this one), Jennifer Schwalm, BiblioArchives
