How to Create a Professional eSports Website

Whether you’re gaining fame on Twitch, YouTube or Mixer, there is no denying it that you need a professional eSports website if you want to be taken seriously by potential sponsors and brands looking to work with you.
A professional eSports website allows you to share important information about your team, highlight your biggest achievements, and build an archive of your past matches and tournaments.
On top of that, a website makes you more discoverable which means potential sponsors and brands are more likely to hire teams that they can easily find more information on.
Luckily, creating an eSports website is not as difficult as it seems. You can easily create it yourself thanks to WordPress and SportsPress and in this post, we’ll show you how.
How to Create an eSports Website With WordPress and SportsPress
To create your eSports website, there are a few more things you will need aside from WordPress and SportsPress:
- Domain name – this will be the URL of your site and how people will find it online. It’s recommended to use a domain name that is the same as your team name. You can also use your Twitch name if you’ve already built a brand for yourself on that platform.
- Hosting – you will need server space where your website files will live and where you will install WordPress. In most cases, you will be able to purchase your domain name and hosting package at the same time. Some hosting companies will even offer a free domain name for the first year if you buy one of their hosting plans.
- Website content – this includes information about your team, images, stats, player bios, and any other information you want to share on your site.
- WordPress theme – you will also need a theme for your site that controls how your site looks. You can start with our Rookie theme which is a free theme that integrates perfectly with SportsPress.
Step 1: Install WordPress
Once you’ve bought your domain name and your hosting plan, the first step is to install WordPress. You will need to login to your hosting account’s cPanel or dashboard using the information provided to you by your host. In your cPanel, look for One-click WordPress, WordPress install or application installer like Softaculuous.
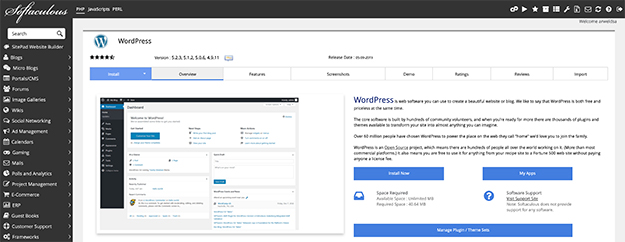
After you’ve located WordPress, click on the icon and then proceed with the installation. You will need to enter a desired username and password as well as your site title. The installation process will take a few minutes. When it’s done, you’ll see a notification with a link to login to your WordPress dashboard so go ahead and do that.
Step 2: Install Rookie Theme
The next step is to install a theme for your site. In your WordPress dashboard, go to Appearance > Themes. Search for Rookie and press the Install button. Once the theme has been installed, click the Activate button.
Step 3: Install and Configure SportsPress
As soon as you activate the theme, you will see a notice in your dashboard that the theme requires SportsPress plugin. You will also see a link to install the plugin so go ahead and click the link.
You will be taken to the new page where you can click Install button and then wait for the plugin to finish installing.
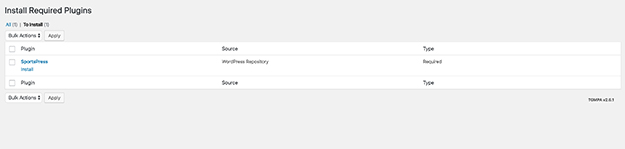
After the plugin has been installed, you will need to configure it. Luckily, SportsPress comes with an easy to use configuration wizard so all you have to do is follow the prompts.
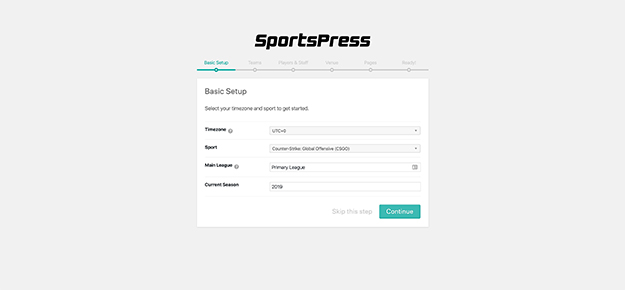
Step 1: Press Let’s go on the initial screen
Step 2: Select your timezone and choose your sport from the drop-down menu. In this example, I’ve chosen Counter-Strike Global Offensive. If your sport is not listed, choose Other > Custom. Now is also a good time to enter your league and your season.
Step 3: On the next page, enter your team name and your opponent’s team.
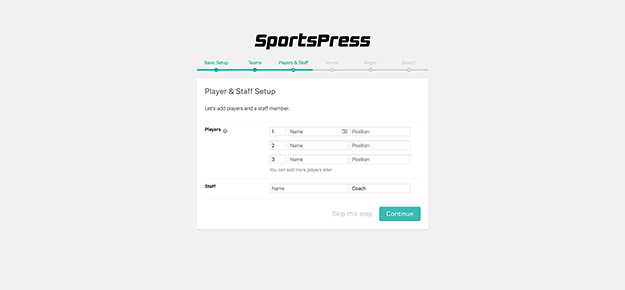
Step 4: The following page allows you to add your team members. Enter their name and information and then press the Next button. Keep in mind that you can add more players later on.
Step 5: The next page allows you to add a venue. You can skip this step or enter the location of your next tournament.
Step 6: On the next page, allow SportsPress to create the necessary pages.
Congratulations, SportsPress has now been successfully configured and you can go ahead and schedule your first event.
Step 4: Adding Your First Event
As you can see from the screenshot, you can easily add information about your event. You can include all the necessary details as well as update the event to include a replay of your stream or gameplay from YouTube or Twitch or another video platform.
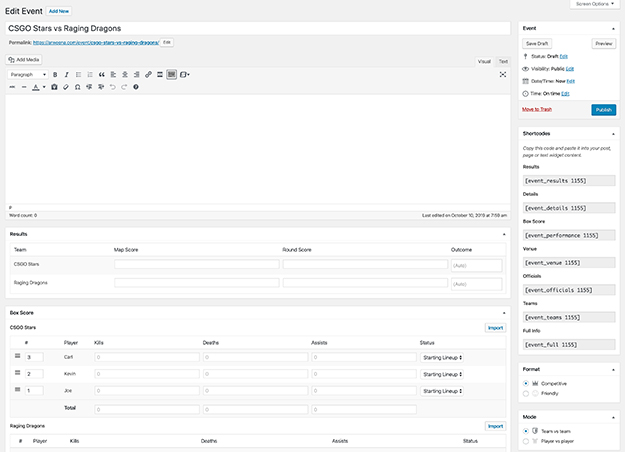
You can also enter map scores, the number of kills and deaths for each individual player, the date of the match and more. When you’re done entering all the information, simply click Publish and your event will be live on your site.
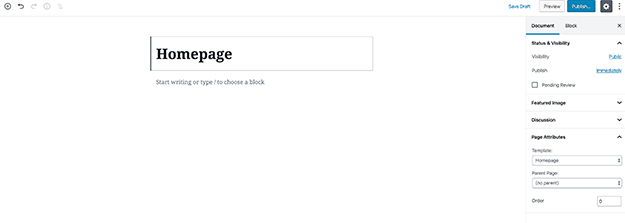
Step 5: Create Your Homepage
The last step is to configure a homepage that will be visible when someone visits your site. Start by going to Pages > Add new. Enter the name for your page and choose the Homepage template in the Page attributes section. Click Publish.
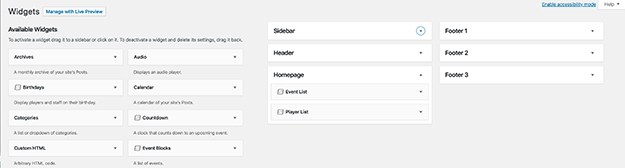
Head on over to Appearance > Widgets and then drag the widgets you want to display in the Homepage sidebar area. In the example below, I’ve added the Event List and the Player List.
Finally, go to Settings > Reading and choose the newly created page as your homepage. Then, save your changes.
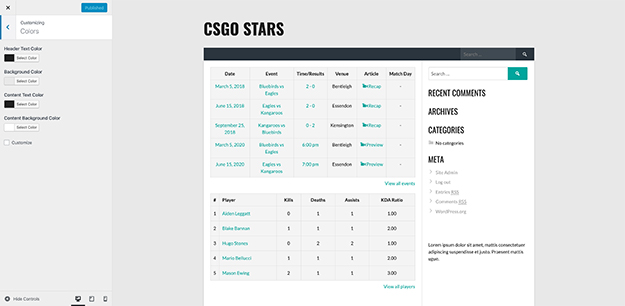
Step 6: Customize Your Site
Now it’s time to customize your site. You can easily do this by going to Appearance > Customize. Here, you can change the colors, upload your team’s logo, add a header image, and more.
Step 7: Add Other Team Members
The last step is to add other team members or other staff members and opponents. You can easily do this by going to Players > Add new. You can enter their biography, information about their current and past team, enter their metrics, and more.
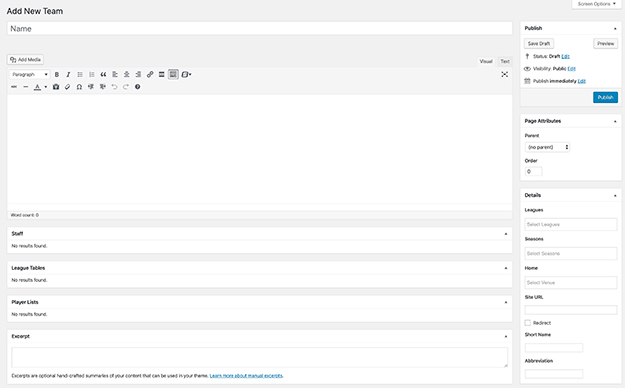
You can also create new teams by going to Teams > Add new and adding their season, league, team bio, and any other important information.
Final Thoughts
Creating a professional eSports website is not difficult once you have the right tools and you know the steps that are involved in the process. Use this tutorial to create your own eSports website using WordPress and SportsPress and don’t forget to download our PDF guide outlining the necessary steps.
