How to Start a Sports Blog

Have you been itching to start a sports blog? A sports blog is an excellent way to share your passion with the rest of the world and make connections with other people who enjoy sports as much as you do.
There are tons of topics to blog about, from keeping track of stats, players, and performance of your favorite clubs and teams to sharing sports strategies, discussing equipment, and generally talking about different sports games.
But, being passionate about a particular sports topic or a team is not enough. There is also behind the scenes work that goes into creating a popular sports blog that attracts new readers while encouraging existing ones to keep coming back to it.
In this post, we’ll talk about how to start a sports blog that everyone who loves sports enjoys reading.
How to Create a Sports Blog
To start your own sports blog, simply follow the steps below.
1. Pick Your Niche
The first step in your blogging journey should be choosing a niche for your blog. The more focused your sports blog is, the easier it will be for you to attract readers and followers that will engage with your content. Choose a topic you’re most passionate and knowledgeable about and keep in mind you can always add more topics later on.
2. Decide On the Blog Name
Once you know what your main topic will be, you need to decide on the blog name. As a general rule of thumb, you’ll want to choose a domain name that’s easy to remember and easy to spell.
You can opt for a name that’s closely related to the main topic, but bear in mind that you might not be able to get the exact domain name. In addition to that, if you decide to expand your blog topics later on, such a name can be too restrictive. For example, if you want to start a football blog and name your blog “College Football Stories”, it will be hard to add extra topics about other sports later on.
3. Choose a Platform
There are many blogging platforms out there but the best platform for your blog is WordPress.org. There are several reasons why you should choose WordPress which include:
- WordPress is free to download and use
- WordPress powers more than 30% of websites online
- There are thousands of free and premium themes that you can purchase for as little as $50 that allow you to build an attractive website without knowing how to code
- You can extend the basic functionality of WordPress with free and premium plugins. Plugins are like third-party ads and you can use them to add social sharing buttons, contact form, payment or donation forms, membership sites, and more.
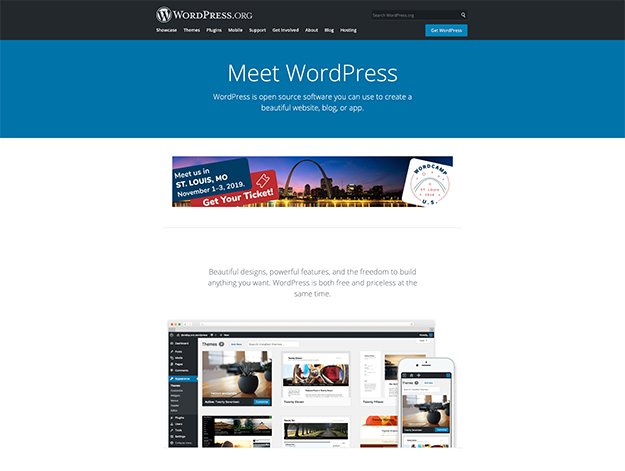
In other words, when you choose WordPress, you’re choosing a platform that can grow with your blog and that’s used by some of the most popular websites on the Internet.
4. Purchase Domain and Hosting
The next step is to purchase a domain name for your blog along with a hosting package. This is needed so your future readers and visitors can find your blog online. In most cases, you can purchase both a domain name and hosting package at the same time.
You can get a hosting package for as little as $10/month and a domain name for around $15/year, depending on the extension you choose. A few recommended hosts include Siteground, Bluehost, and DreamHost.
5. Install WordPress
Once you’ve purchased your hosting package and your domain, the next step will be to install WordPress.

Luckily, most hosting companies have a quick one-click install process for WordPress:
- Your host will email you with information about accessing your account area or your cPanel.
- Using the provided username and password, login to your cPanel
- Look for One-Click WordPress or software installers like Fantastico or Softaculous
- Click on WordPress icon and click Install
- Enter your site title, desired username and a strong password
- Click Finish Installation
- You will see a notice that WordPress has been installed. You can then login to your WordPress dashboard and set up your blog.
6. Install a Theme
With WordPress installed, it’s time to choose a theme for your blog. A theme dictates how your blog looks and there are thousands of free themes to choose from. To install a theme onto your WordPress blog, in your WordPress dashboard, go to Appearance > Themes > Add New.
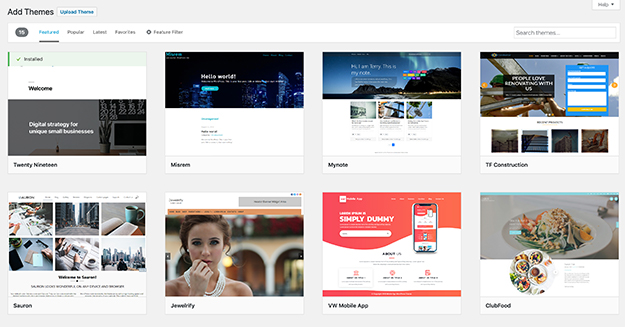
You can then search for a theme that you like. We recommend starting out with our free Rookie theme as this theme was developed with sports websites and blogs in mind. You can search for it in the theme repository and then click on the Install button.
When the theme has been installed, click Activate. You can then go to Theme Settings to change fonts, colors, upload a header image, and otherwise customize the look and feel of your website.
7. Install Plugins
You will also need a few plugins for your site. It’s a good idea to install a contact form plugin like Contact Form 7 so that your readers and visitors can get in touch with you.
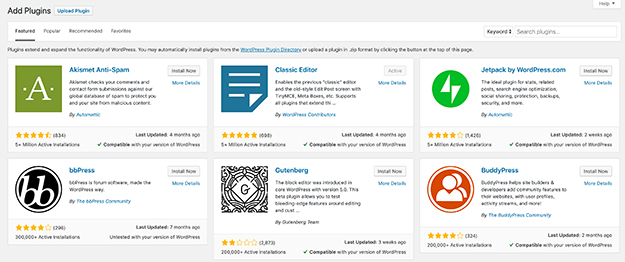
A few other must-have plugins include:
- A social sharing plugin so visitors can share your blog posts on social media
- A security plugin like Sucuri to keep your blog safe from hackers
- An SEO plugin like Yoast SEO to make sure your posts are optimized for search engines so you can get more organic traffic
If you plan on posting about matches and want to share sports statistics or player information, you should install SportsPress plugin. You can download it for free and turn your blog into a professional sports blog in no time.
8. Create and Publish Your Pages
Another important step is to create and publish your pages. You should have an about page that tells the readers more about you and the purpose behind the blog as well as a page that allows them to get in touch with.
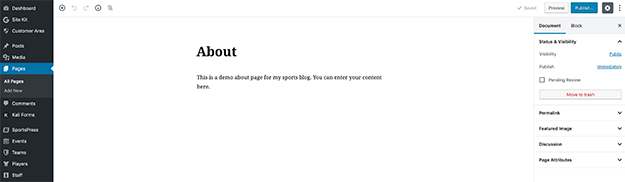
To create a new page for your blog, head to Pages > Add new. Then, enter the name of your page and the contents. When you’re done, click on Publish to make the page live on your site. Repeat the process for all the other pages you’d like to have.
9. Publish Your First Blog Post
When you’re done creating your pages, go ahead and publish your first blog post. To do this, go to Posts > Add new. You’ll see the same editor you used for the pages so all you have to do is enter your post name and then write the rest of your post. When you’re done, you can hit the Publish button or schedule it go live in the future.
10. Keep Going
Now that your blog is live, all you have to do is keep going and publishing valuable and relevant content that your audience will enjoy.
Final Thoughts
Starting a sports blog is not as difficult as it seems. Once you know what all is involved, you can set up your sports blog in one afternoon and embark on your blogging journey. Follow the steps in this article or download our cheat sheet that outlines all the steps and you’ll be a proud owner of a sports blog.
