How to Sell Your Team Merchandise With SportsPress and WooCommerce

Selling team merchandise is an excellent way of securing extra funds for your team. From t-shirts and jerseys to coffee mugs and pens, you are only limited by your imagination to what kind of branded merchandise you can offer.
The great thing about adding an e-commerce store is that you don’t have to actually make the items before selling them. With the rise of print on demand companies, you can create mockups to display in your online store and have them made into actual products only after someone makes a purchase. This saves you from having upfront costs and allows you to see which items are the most popular ones and most interesting to your fans.
To make things even better, it’s easy to add an online store to your existing WordPress website. Thanks to e-commerce plugins, you don’t have to sign up for a third-party platform or worry about sending your website visitors somewhere else.
If you’ve been toying with the idea of selling team merchandise but aren’t sure how to get started, this post is for you. We’ll walk you through the process of installing and configuring an e-commerce plugin, setting up your first product, and show you how to display products on your site.
What is WooCommerce
WooCommerce is one of the most popular e-commerce plugins that allows you to sell both digital and physical products. It allows you to accept payments via PayPal, Stripe, bank transfers, and more and it has hundreds of extensions that make it possible to track your orders and shipments, connect with fulfillment companies, sync your accounting software with your store sales, and much more.

How to Install and Setup WooCommerce
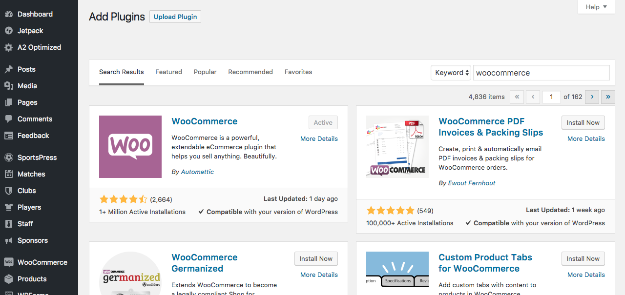
In your WordPress dashboard, go to Plugins > Add New. Search for WooCommerce and then install and activate the plugin.
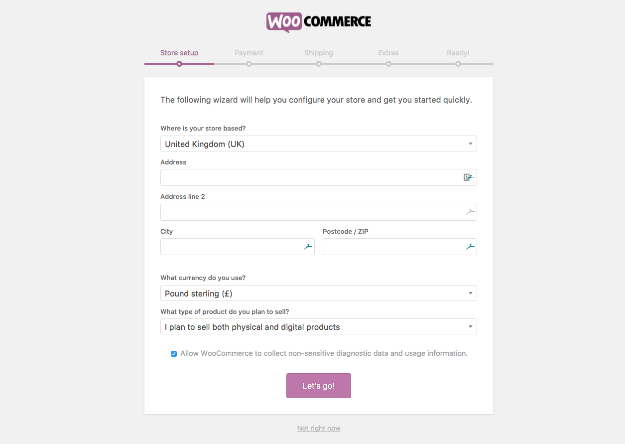
Once the plugin is active, you’ll see a notice in your dashboard to run the setup wizard. Press the button and you’ll be taken to a page where you can enter your store’s details, configure payment gateways, and more. On the first page, enter your store’s location, the address, and the currency in which you’ll be selling.
Click Continue and you’ll be able to select your payment gateways. If you select Paypal, you’ll need to provide your PayPal email address. Similarly, you’ll need to connect your Stripe account if you’d prefer to use it. When you’re done, click Continue.
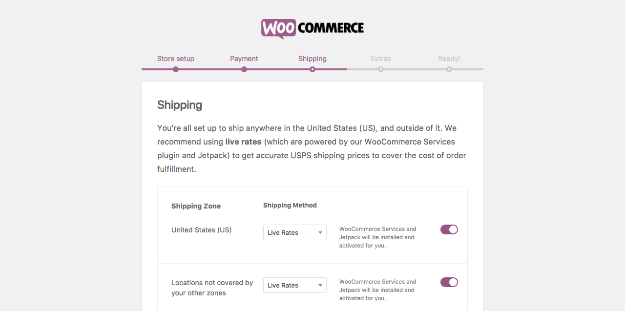
On the next page, you can configure the shipping options and then continue with the setup.
The last step allows you to connect WooCommerce with the Jetpack plugin to benefit from automatic tax rate calculations. If you’re not charging sales tax, you can continue the process without toggling the functionality off. Alternatively, simply authorize the Jetpack connection when prompted and you’ll be good to go.
When you’ve finished entering all the information, you can go ahead and create your first product so let’s do that by clicking Add Your First Product.
Adding Your First Product
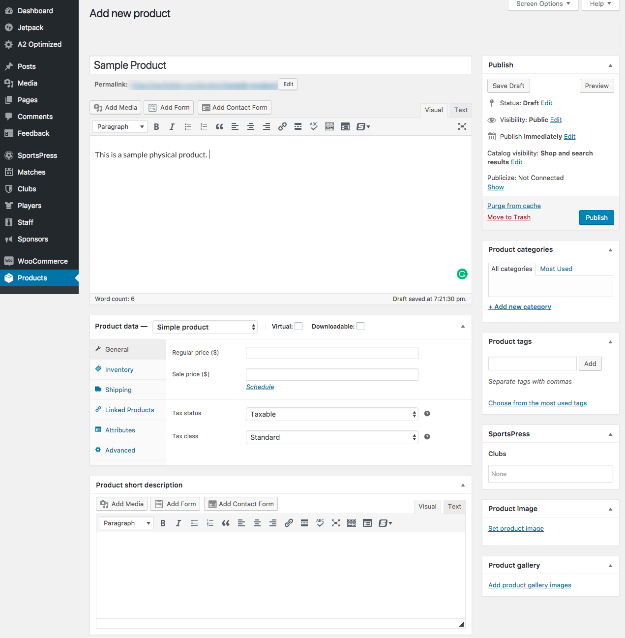
You’ll be redirected to a page that looks very similar to those for creating new posts, pages, and events. You can enter the product name and a brief description of the product.
Immediately below, you’ll notice a few new options, such as the drop-down menu that lets you select whether you’re selling a simple, grouped, affiliate or a variable product.
If you’re selling products like t-shirt, jerseys, hats, or anything else that can be modified by size or color or any other attribute, you’ll want to select a variable product. If you’re creating a digital product, you can select Simple and then tick the box next to Downloadable.
Let’s use a team jersey as an example. We’ll want to set the product to variable. Since we want our visitors to be able to pick a size, we need to create the size attribute first. Look to the left and click on Attributes.
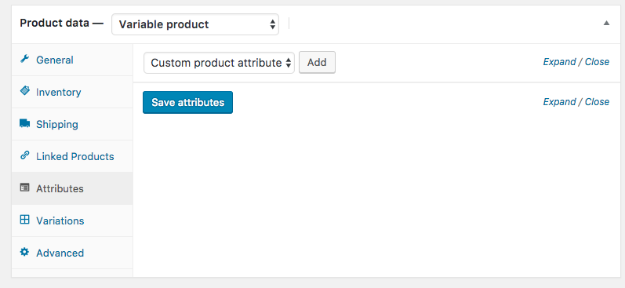
Click on the blue button that says Add. In the box below, enter the name such as Size, and then enter the attributes separated by |. Then, click Save.
Once the attributes have been saved, click on Variations. Select the option to add variations and click Go. After the variations have been created, click on Save changes.
To set the price for the product, click on the link that says Expand Variation. Here, you can enter the price, manage stock status, and assign shipping and tax classes.
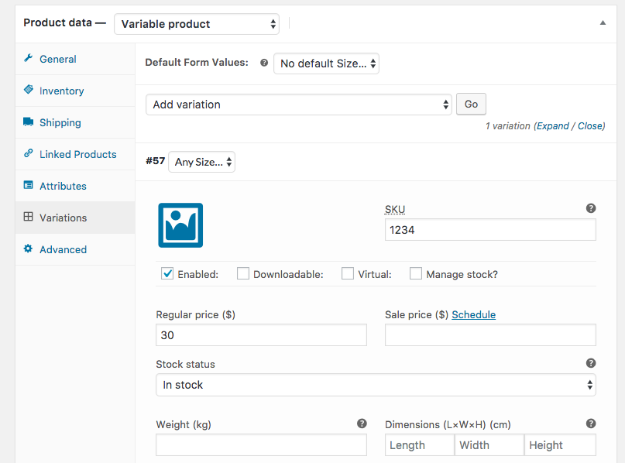
The rest of the options on the left allow you to set how many items you have in stock, enter the product dimensions and weight for shipping, and add a linked product as an upsell or cross-sell. On the right-hand side, you can enter a photo of your product as well as product categories and tags.
When you’re done entering all the information, simply click Publish and your product will be live.

T-shirt Mockup by Pixabay
Displaying Products On Your Site
Now that your product has been published, let’s see how it displays on your site. By default, WooCommerce will install all the necessary pages for an online store during the setup process. If you navigate to the homepage of your site, you’ll notice a new link has been added to your menu – Shop. Click on it and you’ll be able to see all the products listed in your store.
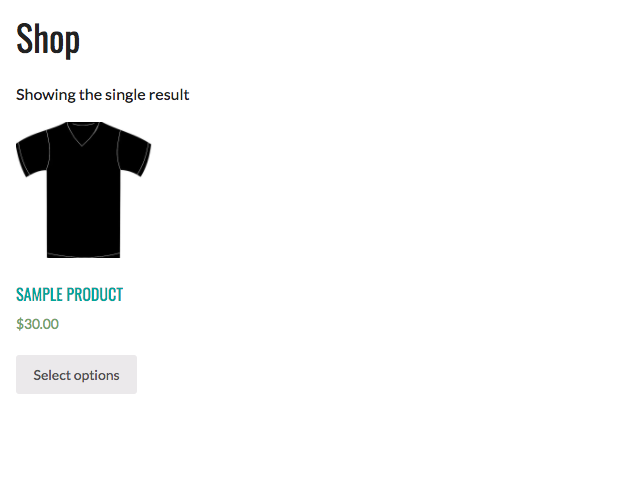
Clicking individual products allows visitors to see more details about the product, select the size and add the product to their cart, at which point they can continue to the checkout process or shop for more products.
But, if you manage multiple teams and want your fans to see products specific to a certain team, listing only the main shop page won’t make it easy for them to see which product belongs to what team. While you can certainly categorize products by teams, there is a better solution.
Displaying Your Store on Team Pages
Thanks to SportsPress and WooCommerce, you can easily display products on team pages. You can achieve this with WooCommerce for SportsPress extension.

With this extension, you can display products that are specific to each team on their team pages. You’ll need to obtain a copy of the WooCommerce extension and install and activate it like you would with any other plugin. To configure the settings, go to SportsPress > Teams and drag the Products to where you want them to display on the team page. You can also add it as a tabbed section.
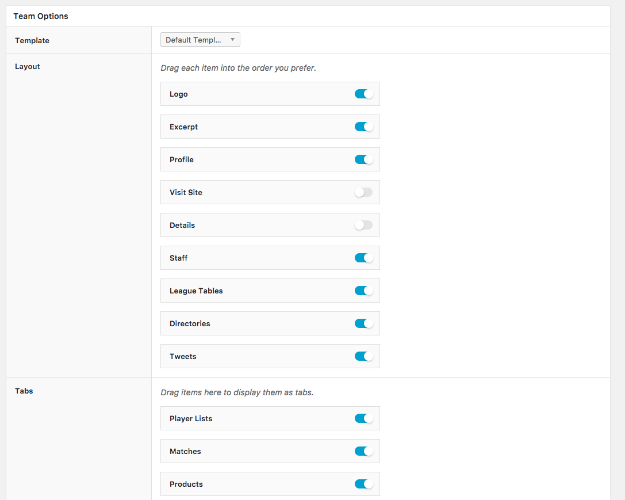
Once you’ve done that, go back to your product and on the right-hand side enter the team name the product is associated with, then update the product. If you look at that team’s page now, you’ll see a new tab or a section that displays all the available products.

Start Selling Your Team Merchandise With WooCommerce and SportsPress
Starting an online store to sell your team merchandise is easy when you have the right tools. Use our post above to help you setup your store and don’t forget to download our checklist of steps to help you along the way.
