How to Create a Soccer Team Website with SportsPress: A Step-by-Step Tutorial
So you’ve bought your own domain and you installed WordPress. Now, you’re wondering what’s next and how to proceed from here to create a website for your soccer team. Nowadays, creating a website isn’t hard nor does it require you to hire a developer.
In today’s post, we’ll show you how to create a soccer website with SportsPress plugin and our SportsPress for Football (Soccer) extension.
To get started with our new website we’ll need a few things:
- A theme
- SportsPress plugin
- SportsPress for Football (Soccer) extension
Installing a Theme

Even though our SportsPress plugin is compatible with any theme, it may require some styling to match your theme seamlessly. Therefore, we’ll use our free Rookie theme for the purposes of this tutorial.
To install the theme, log into your WordPress dashboard and navigate to Appearance → Themes. Click on Add New and search for “Rookie”, then click on Install, and finally, Activate.
Installing the SportsPress Plugin and the Soccer Extension
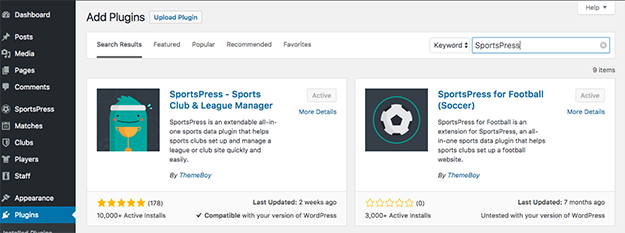
To install the free SportsPress plugin, click on Plugins → Add New and then search for “SportsPress”. The free version of the plugin is a great way to get started and you can upgrade later on for more features. You’ll notice that the extension we mentioned will appear in the search results as well so we’ll install it next.
Once both plugins have been installed, click on Plugins → Installed Plugins and then activate both of them in the plugin list.
Creating Pages
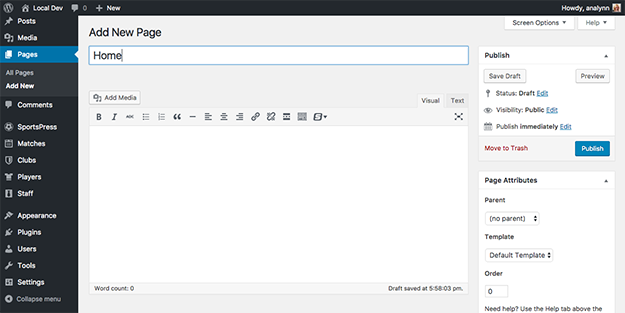
By default, WordPress is set up to show your most recent posts first when someone lands on your website. While there’s nothing wrong with that, it’s not what we want for our website so we need to change that. Doing so will require us to create a new static page to serve as the homepage. Click on Pages → Add New and then simply enter the title for your page, select the Homepage Template from the dropdown and click on Publish. You don’t need to enter any content since we’ll take care of that with the help of widgets.
After you’ve created your homepage, click on Add New and name the page Blog or News to create a page where you will publish news and updates about your team. This time select the Default Template and click on Publish.
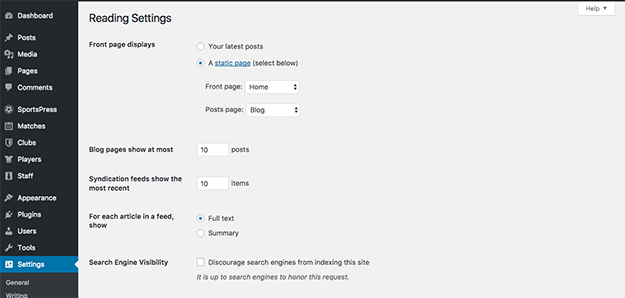
Once that’s done, click on Settings → Reading and select the homepage and the blog page you just created as your Front page and Posts page.
You can then go back and add any other pages your team will need, such as About Us, Contact Us, Press, and similar.
Configuring the SportsPress Settings and Adding Content
Now that you have your pages in place, it’s time to configure the plugin settings and add content to your website.
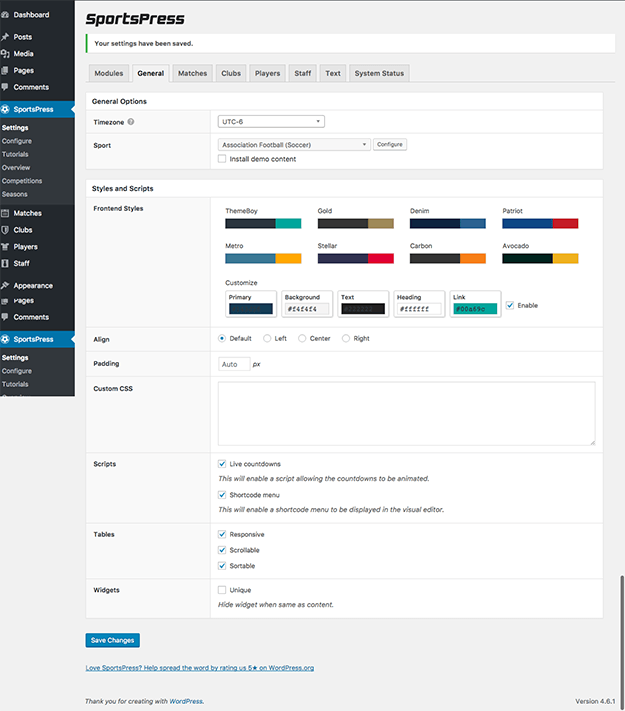
Click on SportsPress → Settings → General. Here you can configure your timezone and select your sport from the drop down menu. Since we’re creating a soccer website, click on Association Football (Soccer) and if you want a head start on setting up the theme, select Import Demo Content before saving changes. This will allow you to see examples of how you might want to configure your website. The demo content will install a couple of players, teams, and matches which you can take a look at to get familiar with how the plugin works.
You can also customize some basic color settings to make your website match your soccer team.
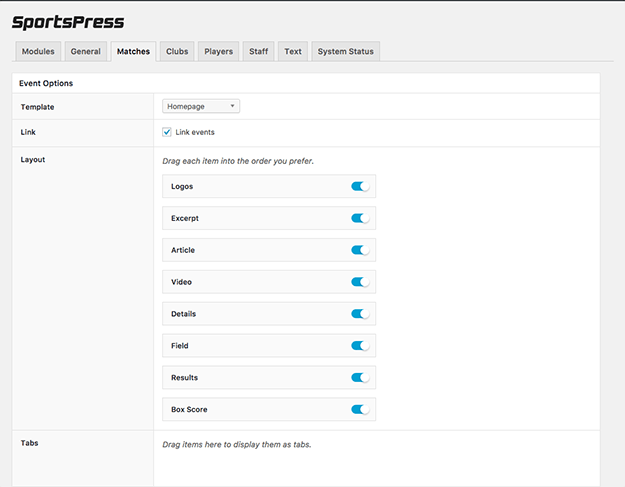
Clicking on the next tab, Matches, will allow you to configure the basic settings for club matches and how they are displayed on your website. The Clubs tab similarly holds the settings for the display of all the clubs you manage and the rest of the tabs include display settings for Players, Staff, and Text.
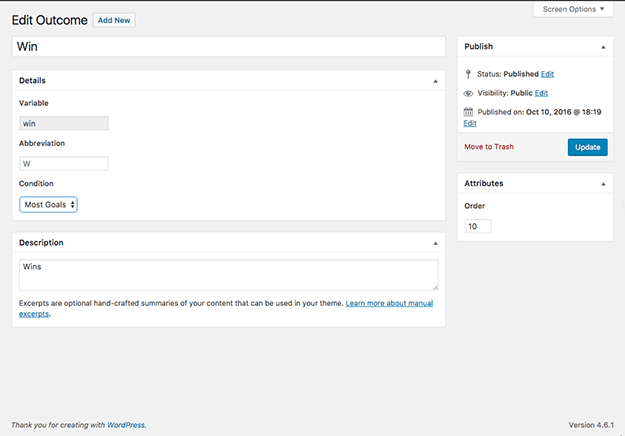
When you’re done configuring all the display settings, click on SportsPress → Configure. This is where you can fine-tune the details for your event outcomes, player performances, league tables, player metrics, and more. By default, sample data is already included but you can edit and customize it to your liking or you can delete it and start from scratch.
The next step is to setup the correct taxonomies for your new soccer website. Think of taxonomies like special categories for your content. They will help you group together calendars, player lists, event outcomes, league tables, and more.
By default, SportsPress is setup to include Competitions and Seasons. Competitions are used to display any league your team is competing and Seasons can be set to include either a specific time of the year or the entire year.
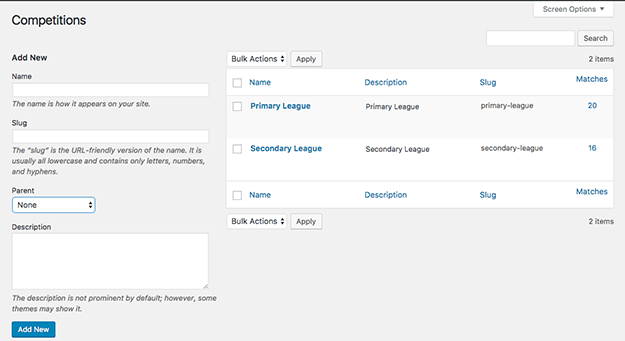
To add a new competition, simply click on SportsPress → Competitions → Add New. Enter a name for the league your team regularly competes on and then enter a brief description if you want to. Repeat the process for all the leagues. If a specific league has subdivisions, be sure to select the main league as the Parent from the drop-down menu.
Next, click on SportsPress → Seasons to go through a similar process of setting up the seasons for your team.
Once you’ve configured competitions and seasons, it’s time to add your clubs, players, and staff. This can easily be done from the left-hand side menu in your dashboard. To add a new club, simply click on Clubs → Add New. You can enter a name and a description for the club. If you look to the left, you’ll see a box that lets you enter additional information such as the competition, season, home field, and you can upload the club’s logo as well.
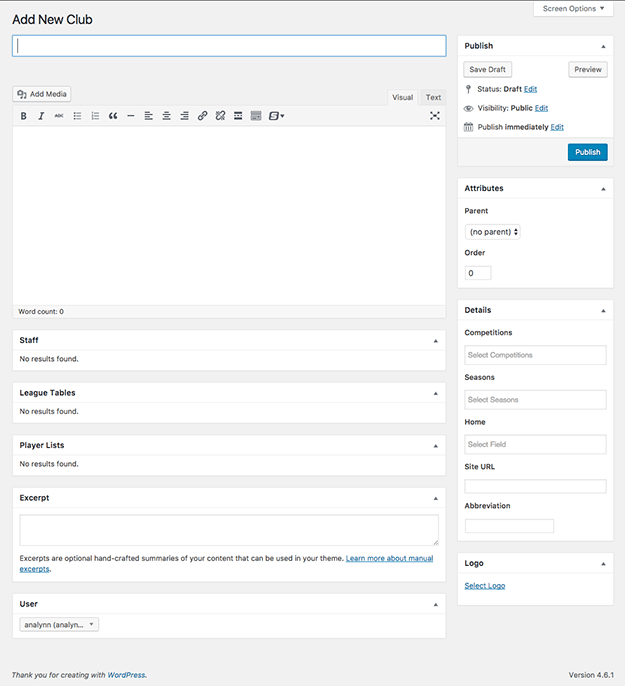
The process for adding new matches, players, and staff is relatively the same. The Players section will let you add the positions you have for your squad and the Matches section has a section for configuring the home field for each team where you can enter the name, a map of the location as well as the longitude and latitude.
Finally, the Staff section lets you enter members of your staff and their specific job titles.
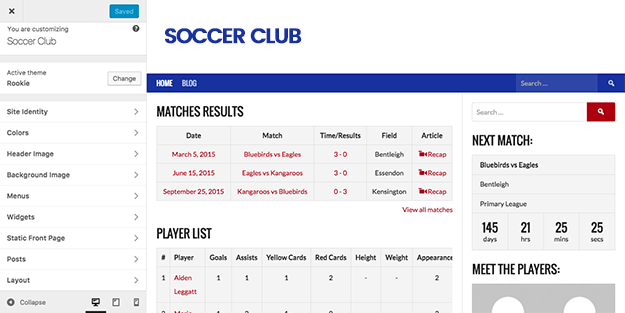
Once you’re done entering all the information and configuring all the taxonomies, click on Appearance → Widgets to finally set up your homepage.

As you can see from the screenshot, the homepage can be configured with various widgets that come with the plugin. You also have a sidebar widget area as well as header and footer widgets which allow you to add various widgets.
For the homepage, we’ve included an event list, a player list, and a league table. The sidebar includes a search bar, a player gallery, countdown to the next match, and information about the coach.
Customizing the Theme
To customize your theme to match the branding of your team, click on Appearance → Customize. From here, you can upload your team logo, change the colors, adjust the layout, widgets, and more. Once you’re happy with all the changes click on Save and Publish.
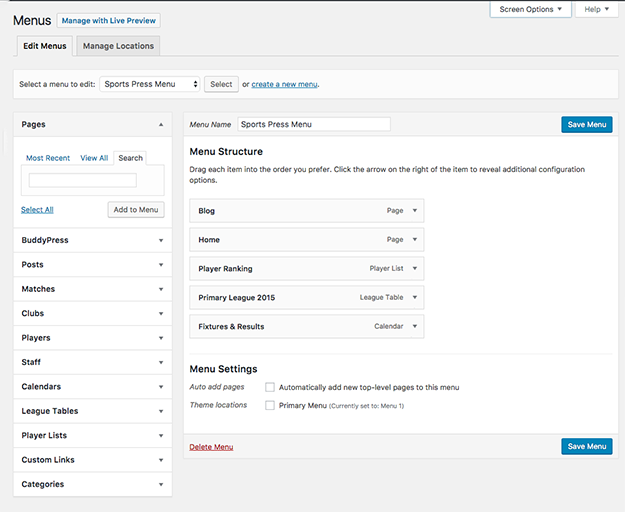
For the final touch, go back to your dashboard and click on Appearance → Menus. Enter a name for your menu and click on Create Menu. Once the menu is created, add the pages you created earlier and then click on Save Menu.
Article continues below…
They'll think you play professional
Get a feature-packed website with player profiles, standings, fixtures and results.
Final Words
If you followed this tutorial so far, you’ve successfully set up a soccer website. If you’d like to do this at a later time, download a checklist of all the necessary steps to reference it as you go along and if you have any questions about our plugin, don’t hesitate to get in touch!
