How to Integrate SportsPress into Any WordPress Theme
SportsPress can turn WordPress into a sleek, bustling hub for your sports tournament or league website. You can use any theme you want, but if you integrate SportsPress with your theme, you can control every aspect of how your website looks and works.
With SportsPress you can track, display, and automatically calculate scores, display event maps, player profiles, and a ton more.
A few coding adjustments to any WordPress theme and you can completely customize your website’s design. You can style it to your exacting specifications and display eye-catching scoreboards and player profiles. They’ll also perfectly integrate with SportsPress.
You can even customize how certain features work by optionally using the WordPress hooks included in SportsPress.
Today, I’ll show you how to integrate SportsPress into any WordPress theme with code. That way, you can further customize the code for your sports website’s design and functionality.
Hook, Line and Sinker
WordPress has what are called hooks included in its code. They let you link the WordPress software in with your plugin or theme so you can completely customize how WordPress works for your website.
It’s easier to remember what hooks are in relation to WordPress when you think about fishing with a hook on the end of fishing line. Once you cast out the fishing line into the water, the hook can catch a fish.
You can think of the water as your plugin or theme. The fish is a certain functionality you want to achieve. By using a WordPress hook, you can cast out into the plugin or theme you’re working on to lock in the capabilities you want to achieve.
There are also two types of hooks:
- Actions – Aptly named, these kinds of hooks let you create an action during any point of loading WordPress page. For example, you could use an action to send a post to social media after it’s published or to display text on the page before other content.
- Filters – These hooks are different and are used when you need to change data before it’s sent to the database or loaded on a page. For example, if you want to change the text on a page before it has fully loaded.
For details, check out The Beginner’s Guide to WordPress Actions and Filters and Hooks: Actions and Filters in the WordPress Codex.
SportsPress uses WordPress actions and filters so you can hook into them to further customize your theme. For details on this, check out the Theme Integration Guide.
Create a Child Theme and Backup
Unless you’re creating or working on your own theme, it’s a good idea to create a child theme since you’re customizing it. Doing so prevents any future theme updates from permanently erasing the changes you’re about to make to integrate SportsPress.
For details, check out the WordPress Codex’s Child Themes page and How to Create a WordPress Child Theme.
It’s also important to backup your entire site after you have created your child theme. That way, if something goes wrong, you can quickly restore it.
For details, check out WordPress Backups in the WordPress Codex.
Creating Your Page Template
By default after you install the SportsPress plugin, your theme’s main page template is used to display features such as scoreboards. But, you can create your own page templates to have total control over how SportsPress features are displayed and styled.
You can either create one page template or multiple ones depending on your needs. The advantage of creating multiple page templates is you can have more control over how each SportsPress features is displayed.
For example, if one particular table isn’t looking exactly like you want it to, but the rest looks great, then you can create multiple templates to style the one table.
You can create one template for each post type that SportsPress uses.
Making a Standard Template
To create one standard template for displaying all the tables and sports data, start by accessing your site on its server through FTP or SSH.
For details on FTP, check out Using FileZilla in the WordPress Codex and How to Use FTP Properly with WordPress.
For details on SSH, check out A Quick Guide to the Terminal and Command Line Prompt for WordPress and SSH Tutorial: How to Use SSH.
Find the root of your site, then go to /wp-content/themes/your-theme/ where your-theme is the folder with your actual theme’s name.
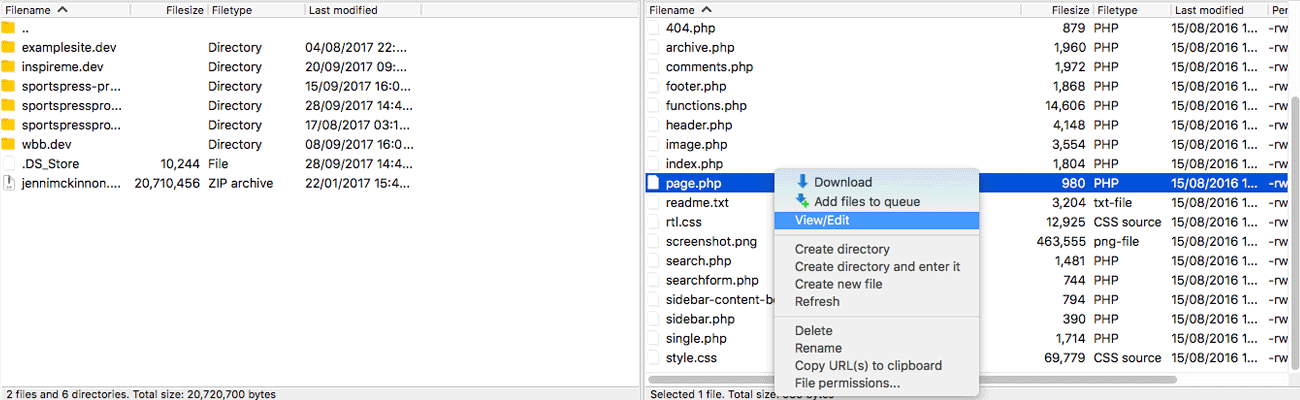
Then, locate the page.php file within your theme’s folder. Make a copy of it in the same folder, then rename that copy to <codesportspress.php.
In FTP and FileZilla, you can right click on the page.php file, click the View/Edit option, then open the file in a code editor.
You don’t need to touch the code yet, but you do need to save the file under a new name: sportspress.php.
Once that’s done, the new file should be uploaded to your server with the original page.php file.
Multiple Templates Per Post Type
If you prefer to have control over the functionality and styling of each aspect of what’s displayed using SportsPress, you can create multiple page templates for each available post type.
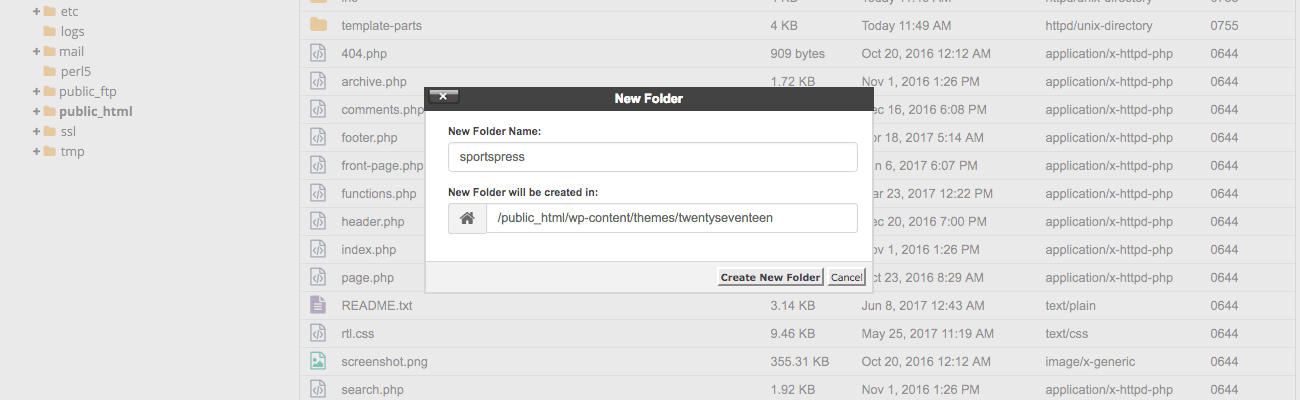
Access the server your site is on through FTP, SSH or a control panel such as cPanel and create a new folder called sportspress inside your theme’s root directory.
You should end up with a directory that looks like this: /wp-content/themes/your-theme/sportspress/. Keep in mind that your-theme should actually be the name of your theme.
Once your new folder has been created, follow the same steps above and copy your theme’s page.php file nine times and place them inside the new sportspress folder you created.
Rename each copy as you go to avoid any errors. These are the file names you need:
- single-event.php
- single-calendar.php
- single-team.php
- single-table.php
- single-player.php
- single-list.php
- single-staff.php
- single-directory.php
- single-sponsor.php
Keep in mind that the final two single-directory.php and single-sponsor.php pages would only work if you have a Club or League license for SportsPress Pro.
Optionally, you can also copy the archive.php file and rename it as taxonomy-venue.php. This would be a custom archive page for event venues.
Adding a Folder in cPanel
In cPanel, go to Files > File Manager and navigate to the root of your theme’s folder. Then, click the Folder button toward the top of the page.

Enter “sportspress” into the field and click the Create New Folder button in the inline pop-up.
Copying Files in cPanel
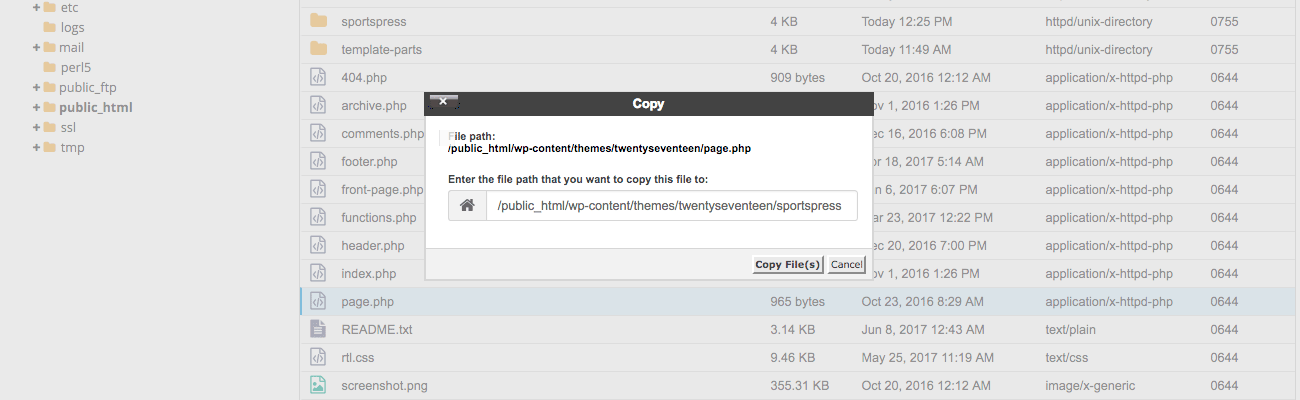
Once your sportspress folder has been created, you need to copy and rename the page.php file as previously mentioned.
In cPanel’s File Manager, click on the page.php file, then on the Copy button toward the top of the page.
A pop-up should appear with a field that’s populated with the path to your theme folder. Add /sportspress at the end and then click the Copy File(s) button.
Then, go to the sportspress directory and click on the page.php file name, then on the Rename button toward the top of the page.
Rename the file by entering the appropriate file name into the field from the list mentioned earlier. Click Rename File to finish up the file name change.
Next, repeat these steps for the other eight files.
Once that’s done, you can continue by declaring SportsPress support and editing your theme’s files to meet your needs.
Enabling SportsPress Support
This step is optional, though, it’s helpful if you want to remove the admin notice in the back end. Otherwise, it stays up and notifies you that your theme doesn’t support the SportsPress plugin.
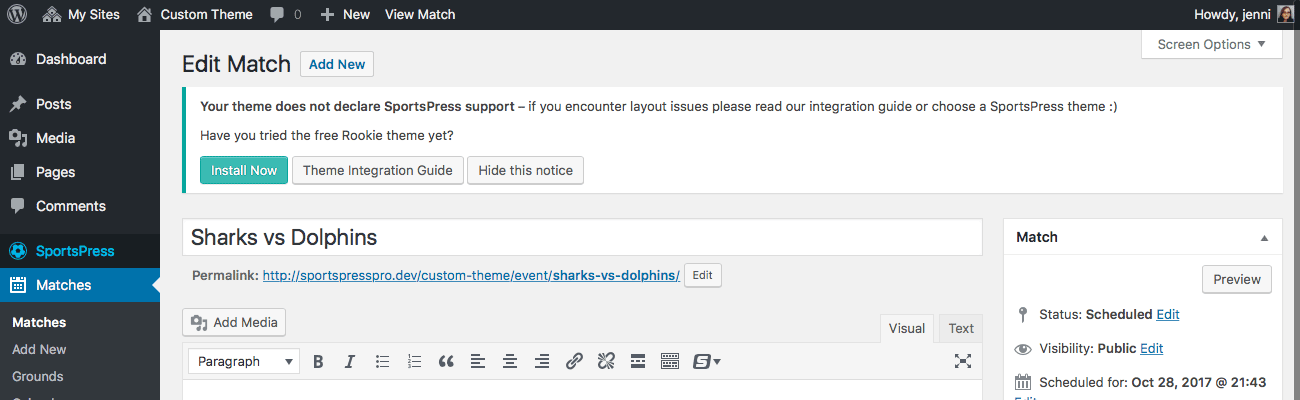
Once you’re happy with the changes you have made, you can choose to hide that notification by declaring SportsPress support in your theme’s functions.php file.
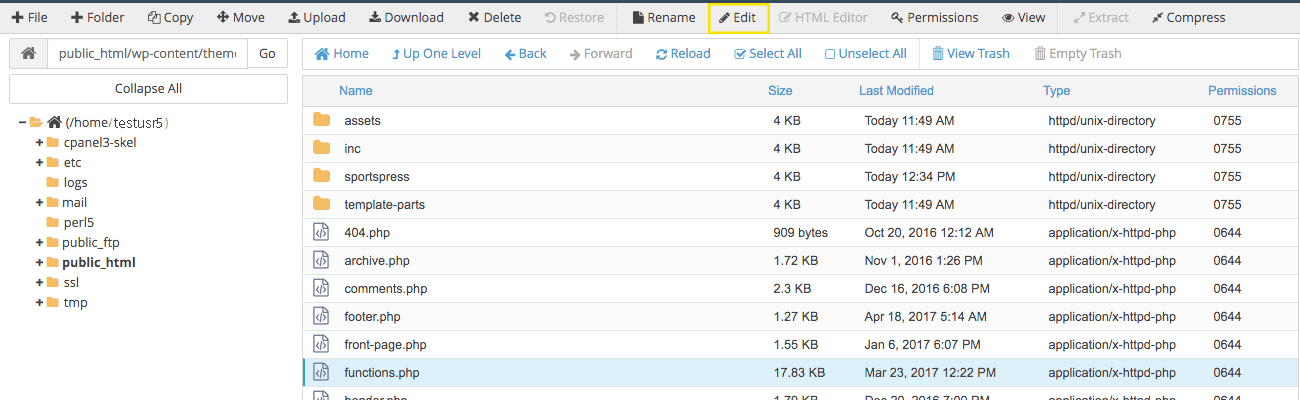
Access your site on your server through FTP or SSH once again and locate the theme you edited to integrate SportsPress.
You should find your theme under /wp-content/themes/your-theme/, but remember that your-theme would actually display the real name of your theme.
Locate the functions.php file within your theme’s folder.
If you created a child theme and you don’t see this file, then you should create one. For details, check out How to Create a WordPress Child Theme.
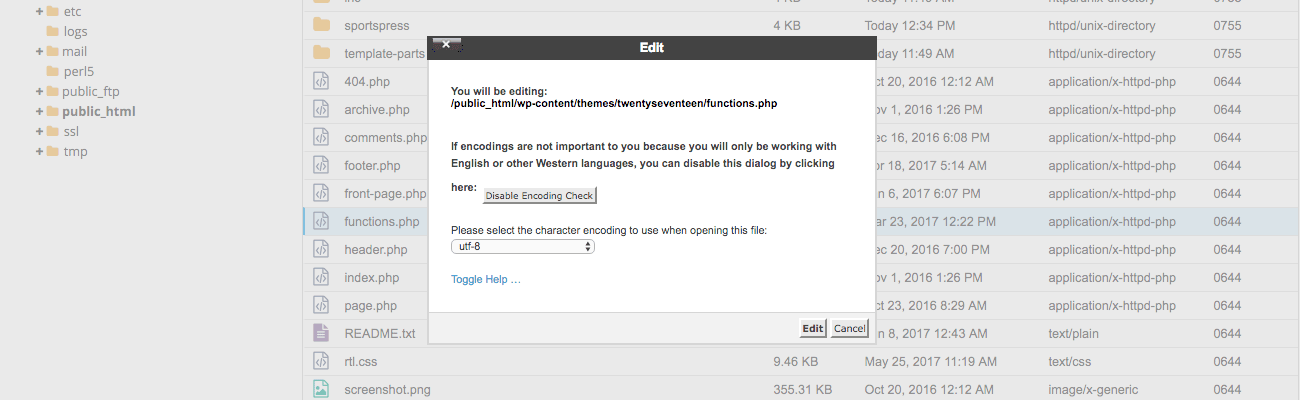
Download the file and open it in an editor or else view and edit it directly in your FTP or SSH client.
Add the following line to your theme’s functions.php file to declare SportsPress support:
add_theme_support( 'sportspress' );
If you’re not sure where you should place this line within the file, check out the WordPress Codex’s Code Reference page on adding theme support.
Save the file and if you downloaded it instead of editing it directly in your FTP or SSH client, then re-upload the edited file.
The admin notification should now disappear automagically after reloading your website’s back end.
Editing a File in cPanel
In cPanel, open the File Manager under the Files section and locate your theme’s functions.php file. Click on it, then on the Edit button toward the top of the page.
A pop-up should open to confirm your choice. Be sure that utf-8 is selected in the character encoding drop down box. You may need to scroll down to see it.
Next, click on the Edit button.
A new tab should open in your browser with the built-in code editor. Add the line mentioned above to declare SportsPress support, then click the Save Changes button at the top, left-hand side of the page when you’re done.
When you see a notice letting you know your changes have been successfully saved, click the Close button that’s next to Save Changes.
Customizing Your Templates
Now that you have added SportsPress templates to work with and declared SportsPress support, you can continue to edit your theme and style it to perfectly integrate SportsPress features.
In addition to editing your website’s design by editing the CSS in your theme’s style.css file, you can also edit your templates to include hooks.
While it’s entirely optional, you can edit the templates you created earlier to customize the functionality of SportsPress.
You can include as many actions and filters as you need to achieve the changes you want to create.
Check out the Actions and Filters SportsPress documentation pages for comprehensive lists of the hooks you can use.
Integrate SportsPress Automatically
If you would rather not touch any code, there is an option that lets you automagically integrate WordPress: choose from one of the eye-catching premium SportsPress themes.
They’re ready to go to use with your sports club or league website and they also look incredible with all the SportsPress features. Better yet, you won’t have to edit any code.
You can also install the free Rookie sports theme if you’re not ready to go for a premium option.
Wrapping Up
You can use any theme you want with the SportsPress plugin and all the scoreboards and player profiles should look perfectly great on your sports website. But if you want to take it up a few notches, you can completely customize a theme and integrate SportsPress to get your desired look and functionality.
If you prefer the automatic route, you can install a SportsPress theme for a uniform and sleek user experience—without touching code.
Were you able to integrate SportsPress into your theme? Did you run into any troubles along the way? What kind of sports site do you want to create? Feel free to share your experience on Twitter and Facebook.
